
Allonis Allonis
  • Products
    • Audio
      • Audio Integration
      • Audio Streamer
    • Control & Automation
      • Controllers
        • TVBox Controller
          • TVBox Getting Started
          • TVBox - Overview
        • Rack Modular Server
    • Customer Listening
      • Listening Overview
      • Listening Demo
    • Digital Signage
      • Signage Overview
      • Signage Demo
      • TableTopper
      • TableTopper Demo
    • Supported Hardware
    • User Interfaces
      • SmartRemote
        • Introduction
      • SmartScreen
      • User Interfaces
        • SmartRemote
          • Introduction
        • SmartScreen
    • Video
      • Mosaic Video Wall
      • Video Integration
  • Solutions
    • Commercial
      • Allonis Commercial
      • Bars and Dining
        • System Overview
        • System Demo
        • Installations
        • Sports Bar Info
          • Project Process
          • Competition
      • Entertainment
      • Fitness Centers
      • Worship
      • Installations
      • Casinos
      • Corporate
      • Point of Sale System
    • Residential
      • Allonis Residential
      • Home Control
        • Control Overview
        • Control Demo
      • How it Works
      • RV / Marine
        • Shelly Relays - RV Slide Control
      • Works With
  • Shop
  • Support
    • Documentation
    • Get Help
      • Warranty
    • Forum
    • Downloads
    • Dealers
    • About
  • Login
Client Support
248-918-0123
Contact Us
remote upright home left

Video of the initial SmartRemote boot

As the SmartRemote relies on connecting to myServer automation controller to perform all tasks, setup myServer controller first.  Some YouTube tutorials exist.  It is ALWAYS best to follow the text instructions for more details.  Use the YouTube tutorials as examples.

Record the myServer IP address that you set it at,  and ensure the SmartRemote template is installed and renamed "smartremote". Then continue below to setup the SmartRemote on the myServer network:

  1. Unbox your new SmartRemote.
  2. Connect the hub to it's USB power pack.
  3. Connect the USB power pack to a 110V AC wall plug
  4. Dock the SmartRemote in the hub and let it charge.  You will see the battery percent full on the screen.
  5. Once the remote is charged, you can undock the SmartRemote (for ease of use) and then click the Power button on the right / upper side (long press).  A Long press of the power button gives you the option to reboot or shut it down.

Timeline:

0:19: You will see the Allonis Logo, followed by an "explosion" clip.

0:15: You will see a "circle". The software image is expanding the SmartRemote's memory at this point.

0:31: Once booted you will be at the Android Desktop.

00:45: Wait and the SmartRemote app will launch. You will see the SmartRemote.apk launching.

00:50: Once finished loading:

  1. Click the "CONFIGURE WIFI" button.  Click the button twice for it to respond (normal).
  2. Turn Wifi On (top right)


In a few seconds, you will see your available Wifi Access Points that are within RF range.

       3. Select the appropriate access point. 

Only connect the SmartRemote to the one Wifi Access Point that connects to myServer.  If you add a second wifi network, then the device might get on the wrong network and you'll wonder why the SmartRemote isn't able to control anything.  Of course, you might use the SmartRemote in two facilities, each having it's own Wifi network.  That's fine to configure both as the assumption is the SmartRemote won't see both of those networks at the same time and connect to the wrong one.

4. You can type that access point's password. You can click Show password to be sure you are selecting the correct letters / numbers from the tiny onscreen keyboard.

5. Once the password is entered, scroll down a bit and click on Advanced Options.

6. Recommended is to deselect DHCP and select Static addressing. This will allow the SmartRemote to connect to the network fast.

7. Type your correct IP address for the device. Ensure the IP address is not already in use ("ping" the chosen IP address from a network connected laptop and ensure no responses are seen), and if you set Static, then ensure the IP address is not in the DHCP range for the Router. You can click on the webpage to temporarily remove the on screen keyboard that may be covering the field you need to click on or see.

8. Type your Gateway IP address. Typically this is your Router's IP address on the LAN. (not WAN).

Type your Network Prefix Length.  Most networks use "24".  Android has a little bug entering information in these fields...make sure it doesn't add it's own digits to yours you type.  Delete them if they appear.

9. Type your DNS server 1 and 2 addresses. This can be provided by your Internet service provider. You can also use the default Google's DNS servers which are:  8.8.8.8 and 8.8.4.4

7:10: Once all of your info is entered, click the Connect button.  You should see that you are connected to the Internet.

Your SmartRemote should soon be on the network!

11. You can click the Back hard button to get back to the SmartRemote.apk

8:56: 12. Click Exit to close and then relaunch the SmartRemote app from the Desktop smartremote app logo.

9:17: If you are online, you should see the screen to enter your network information for myServer.


To Manually configure (be careful that you type in the correct information in each field!):

1. Type on the myServer IP Address box. The on screen keyboard will appear. Type myServer's IP address.

2. Next, click on the Project Name box. "smartremote" is the correct default folder name (the folder on myServer's webserver) (type with no quotes).  Note this name is case sensitive.  So, it's "smartremote", not "SmartRemote".

3. Click on the Clientname field. You can name your remote what you want.  For our purposes, we will call it "SmartRemote8".  Don't put spaces in the name.  Keep the name simple as it will be used in lots of macros and variables.

4. Click the Save button.  If you have a second myServer to configure, click on the Server #2 tab and enter that information.  Click Save.

The Default Connection is the server that will be used on startup.  You can also deselect but then you will need to choose which Server to connect to with each app startup.

This concludes all configurations that are done on the actual SmartRemote.  All user interface changes are made in "myDesigner".  All button actions are defined in myDesigner as well.  The rest of the configuration including all controlled device support is done in myServer application.  The above configurations can be cleared and saved if the remote will be sold or gifted to someone else.

The SmartRemote.apk (the "app") will launch, check that it's on Wifi, connect to myServer, and load the user interface smartremote template home page that you defined.  If you don't see a webpage loaded, check your network settings, myServer connection settings and that you have a web project same name as the SmartRemote's connection settings are configured for.

New in version 2.2.0 of the smartremote.apk is a Reset Settings button.  This will clear all prior myServer connection settings.

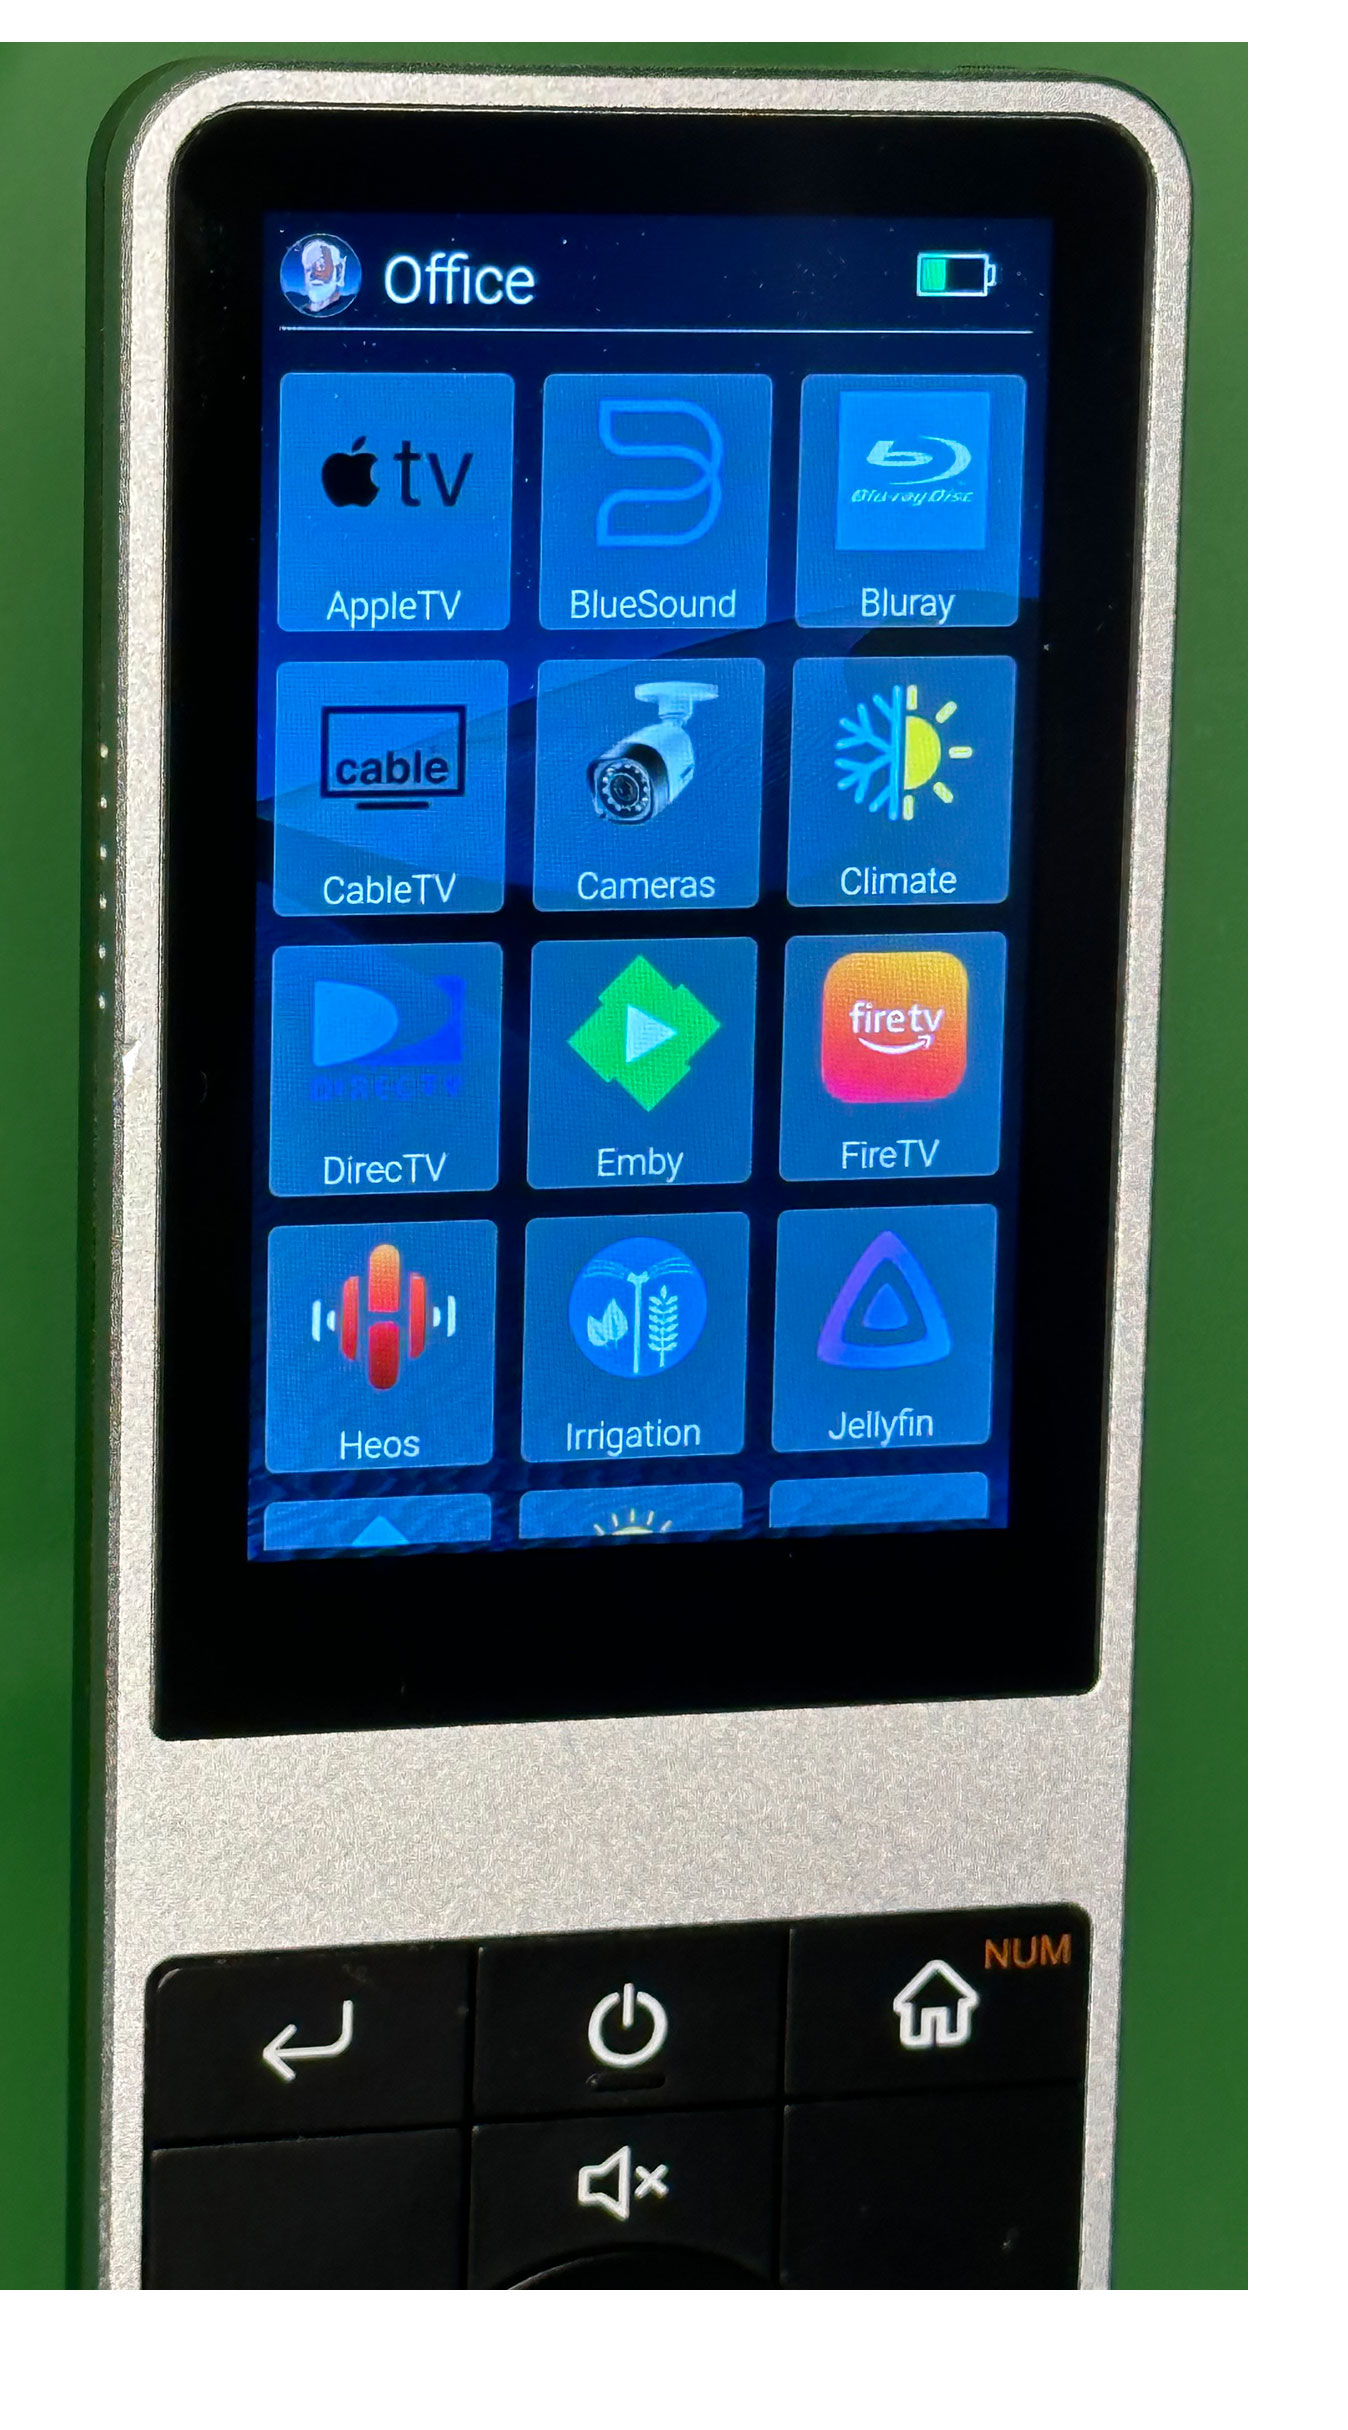
Typically, once the webpage is loaded, you would click on the top of the webpage, select a user, then select which room you are in to control the devices in that room.  The "activate-room.study" macro will be fired if you chose the Study room.  This macro defines which device icons appear on the webpage and that webpage defines the function of the hard buttons (that you can edit in myDesigner).

Tidbit:  If you are testing the smartremote webpage on a browser NOT on the SmartRemote, you can go HOME by clicking the F5 button.

Note that a LONG press on the side power button will reboot the OS of the SmartRemote.  The Back and the Home button can be used to navigate the AndroidOS.  No other buttons are enabled unless the smartremote.apk is running and a smartremote webpage is displayed on the screen.

Note that any new webpage will take much longer to load.  On the second load, the graphics will already be saved in the SmartRemote cache to load quickly.  If you shutdown the smartremote.apk and restart it, then the long load time will start again until all pages are loaded once.

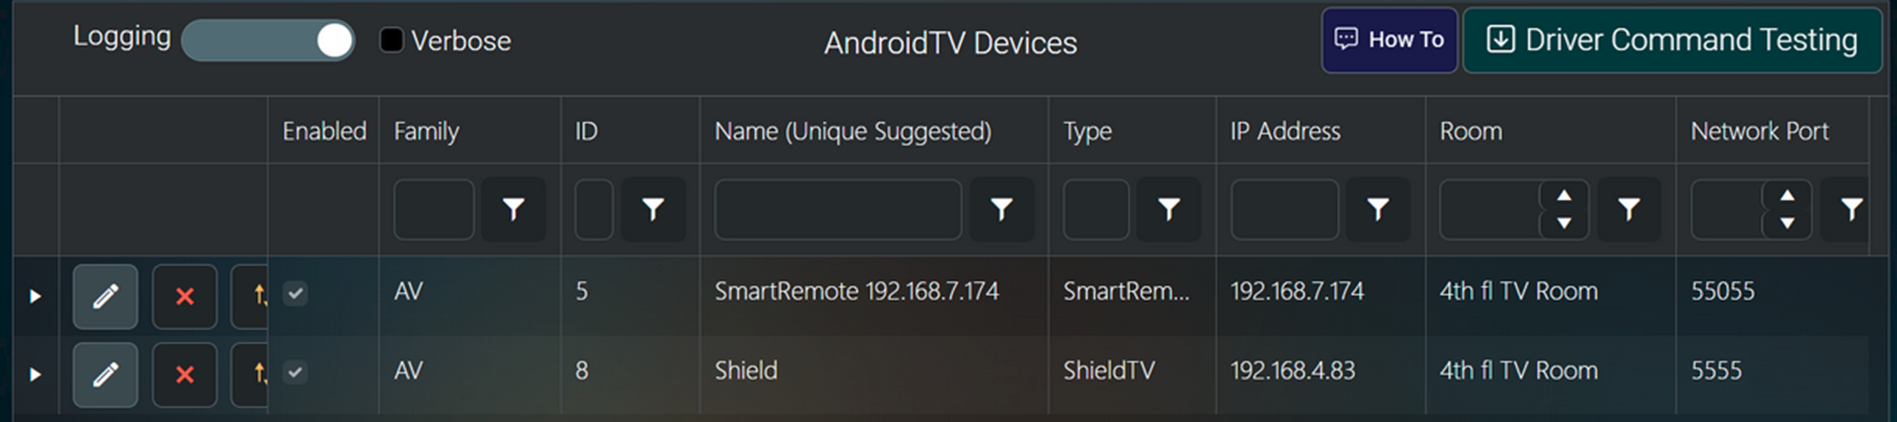
From a PC browser, go to myServer's Dashboard. Click on Management / Drivers / AndroidTV's configure button.

Click the Discover button. Soon, the powered on and networked SmartRemote will be added automatically. You should see it's power state in the Power Testing area. Here you can update the SmartRemote.apk if updates are available. The apk updates are distributed in myServer updates. 

You can also test launching the smartremote.apk and shutting it down from within myServer's Driver dashboard.

The reset of the configuration is done in myServer's templates and macros, automation rules, etc.


System design consideration:  Infrared

One of the reasons for creating a new hardware build version of SmartRemote was to add an Infrared emitter in the nose of the remote. The previous version did not have this because we believe the better strategy is to use an IR "IP2IR" hub anywhere on the network where you have IR devices. ie: a distributed IR network. But then we got thinking, for simpler "one room" systems, it would be a little more cost effective just to do the standard "point and shoot" remote control use.

The user interface is generated by myServer's webserver and displayed on the remote's browser screen. Depending on which room you have selected to control, that room may have devices that are intended for "local IR" control. You still configure the IR codec to use (specific to the IR device) within myServer's IR application. A new myServer command was added "sendIR|ircode". This will grab the codec for that device from myServer, send it to the SmartRemote, which will then "play" that IR transmission to the IR device. And then your old fashioned (non IP) TV turns on.

Here is the more powerful infrastructure: SmartRemote <> Wifi <> myServer > IR codec <> ethernet <> IP2IR > IR emitter > IR > IR Device
And here is the new "Point and Shoot" that can coexist: SmartRemote <> Wifi <> myServer > IR codec > SmartRemote IR emitter > IR > IR Device

You could support IR in multiple rooms, each having the above choice for setup. With the IP2IR equipped room, you could manage that room's devices from anywhere and / or from a myServer automated schedule (turn the TV off at 10pm). With the new Local IR control, then certainly the SmartRemote needs to be in the room and pointed at the IR device.  If the SmartRemote was in the room (and booted), and pointed at the IR hardware, then technically it's possible to use it for automated events, but that is very impractical.  Hence our recommendation to use an IP2IR for IR.


 11.24.2025:  Allonis adds Reset Settings choice and caching of button push when SmartRemote doesn't yet have a web socket connection to myServer (when the remote is asleep and off the network).  This will send that button push once the SmartRemote has a web socket connection - so no need to repeat the button push.  Requires 2.2.0 of the apk (available in today and later versions of myServer) and for your smartremote template to be updated to latest javascript (uses today and later myDesigner6).

6/26/2024: Allonis added support for the SmartRemote's backlighting of the hard buttons, revised algorithms for controlling screen on / off, and the new "Find my Remote" feature.  To enable these functions, you will need to be on latest myServer build, and latest SmartRemote Template. So, if you have a SmartRemote that is on the myServer network:

Optional but nice to do: Updating the SmartRemote.apk (the "app" that lives on the SmartRemote)


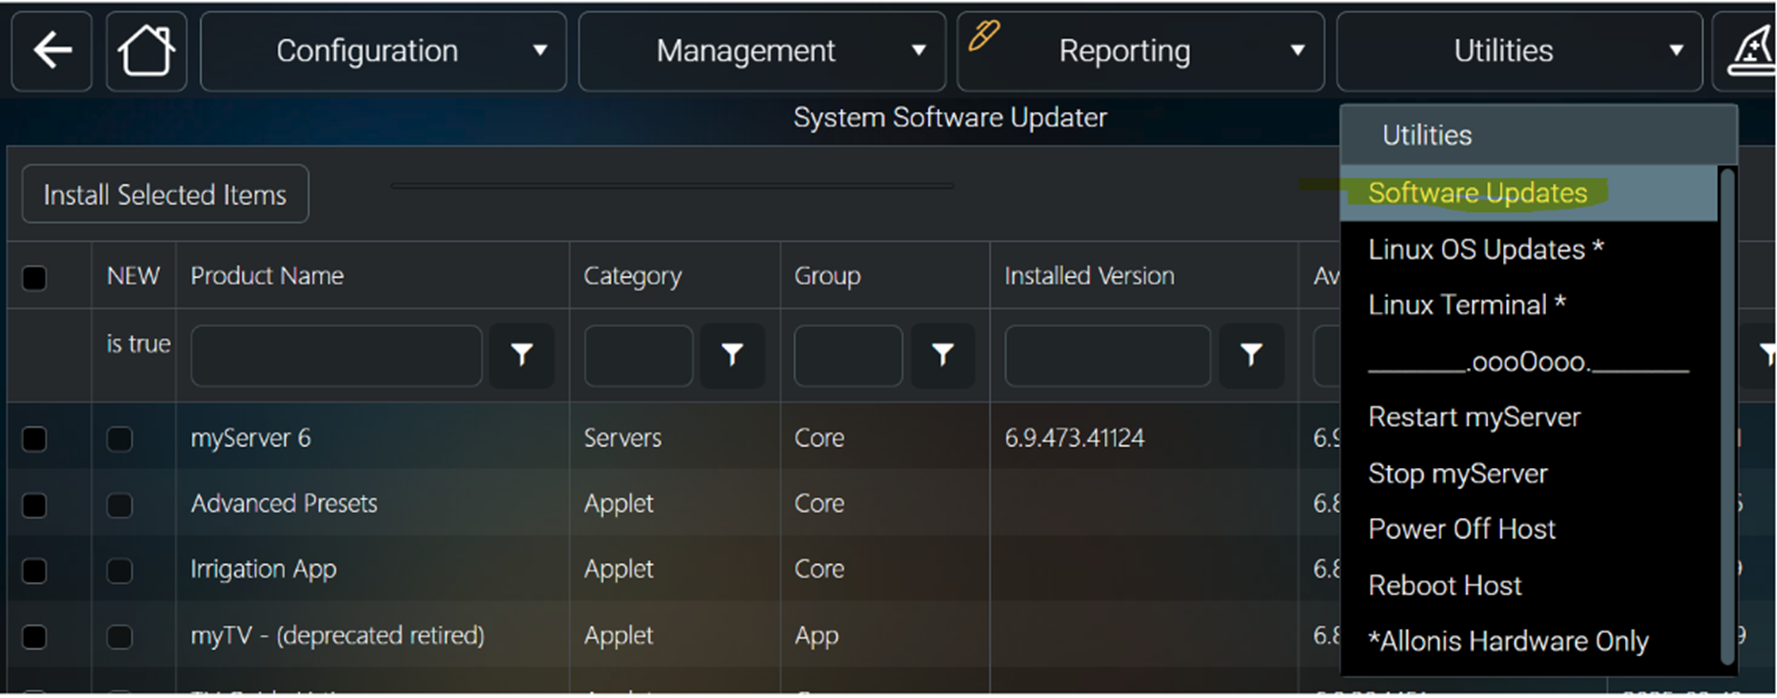
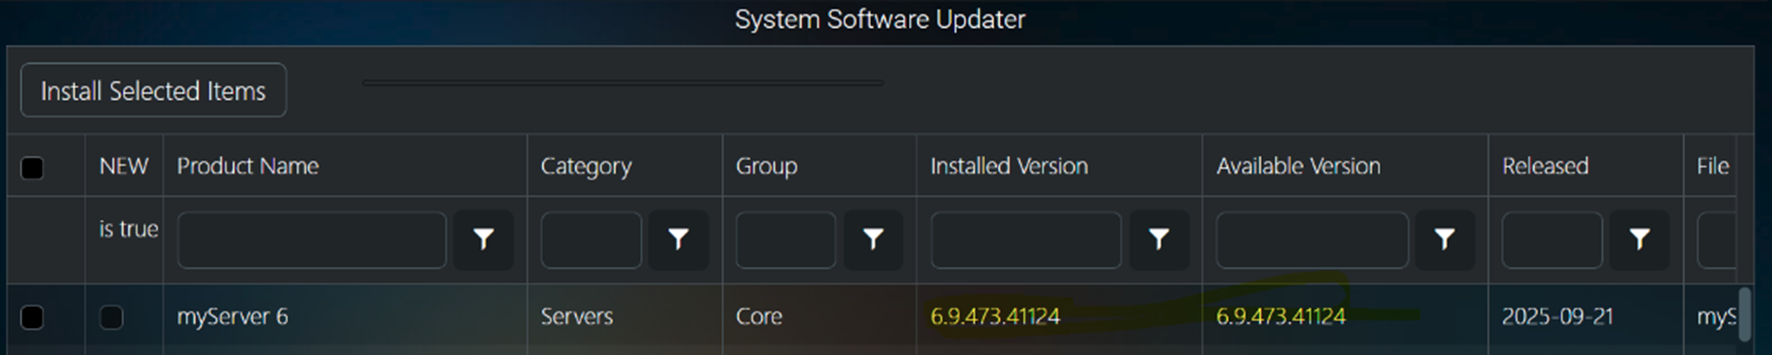
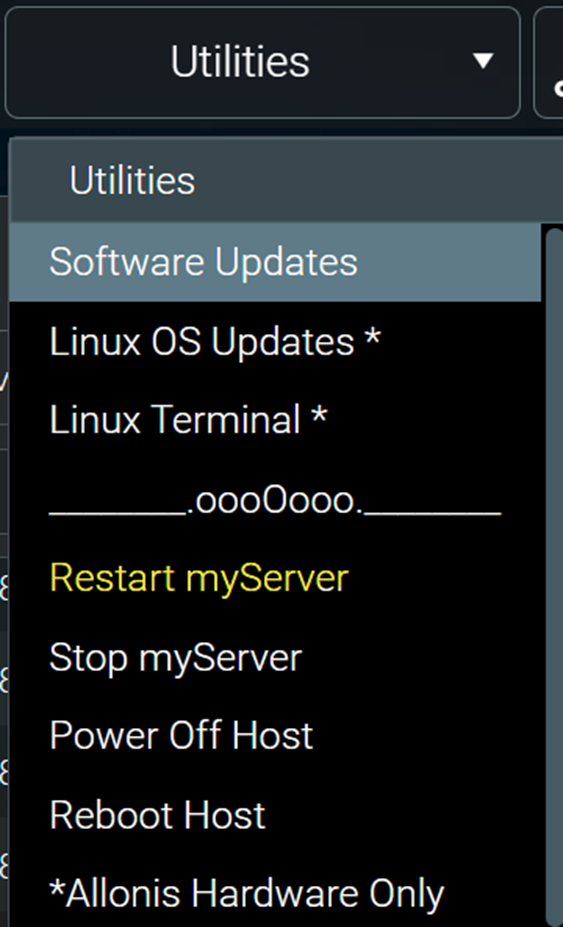
  • 1) Install the latest myServer build from myServer's Software Updater.

Software_updater.jpeg

Software_updater2.jpeg

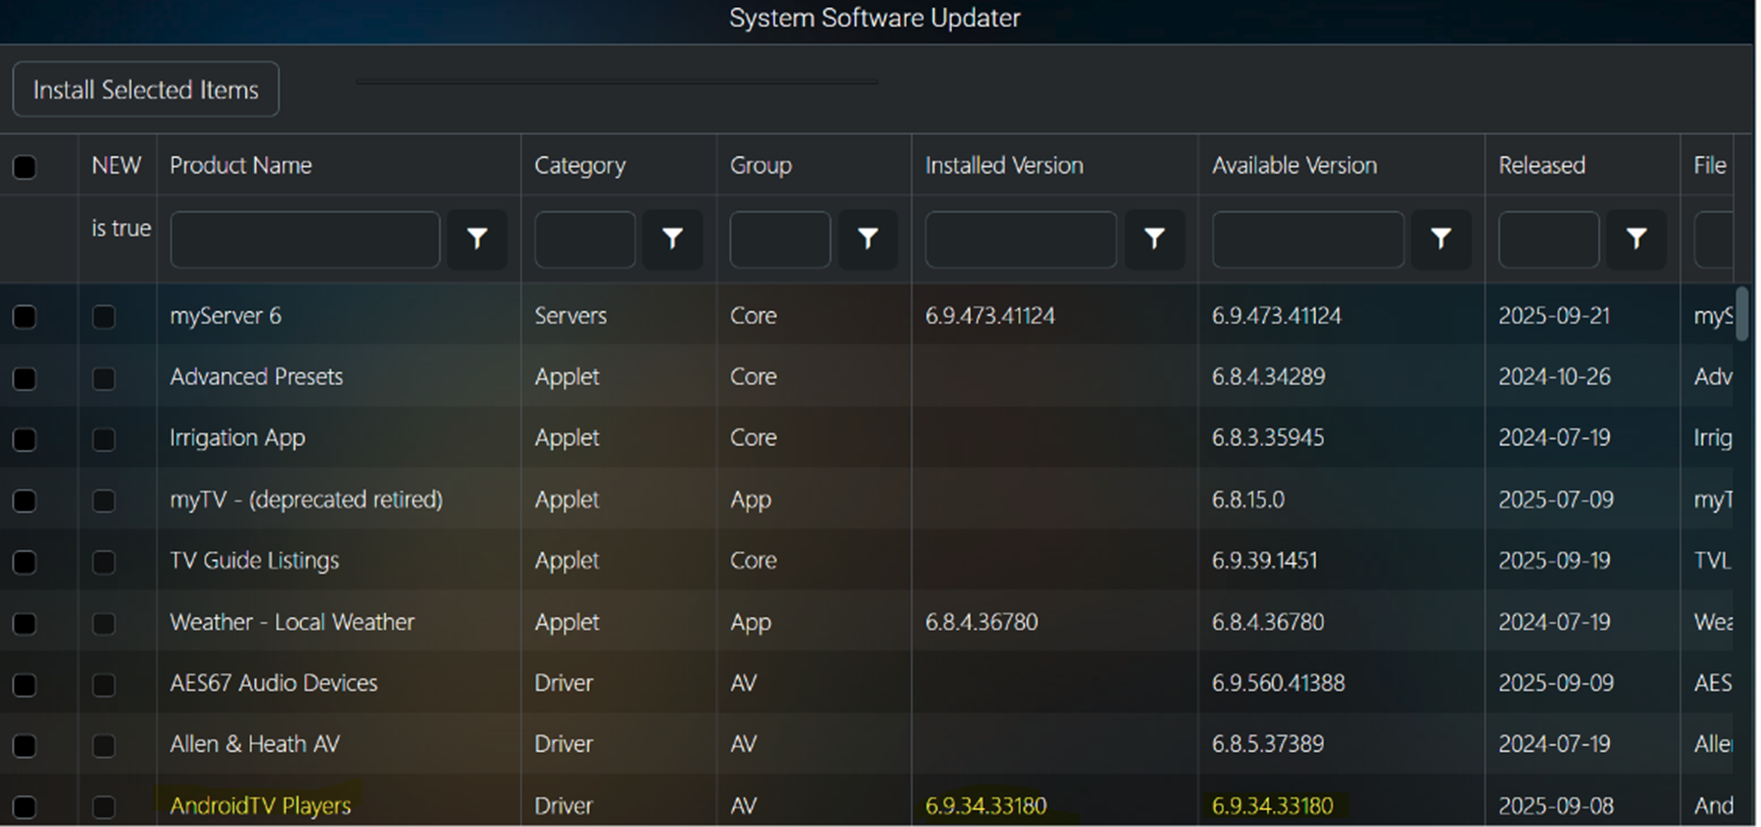
  • 2) Ensure you also have the latest AndroidTV Driver and have added your SmartRemote to the list of Android Devices.
    • Latest Driver
    • Software_updater3.jpeg
    • Now go to Management -> Drivers
    • Software_updater4.jpeg
    • Find Android TV 
    • Software_updater4.jpeg
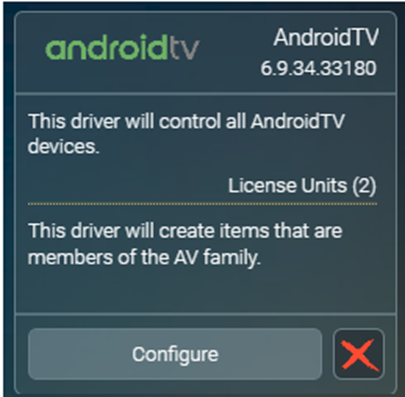
    • Press Configure and make sure SmartRemote is there
      • Software_updater5.jpeg 


  • 3) Update to the latest SmartRemote Template.  
    • Go back to System Software Updater 
    • ***Backup your custom webpages and change the smartremote-sampler file name to "smartremote" folder name.  
    • ***You can also copy back your custom webpages from your backup.
      • *** I have no idea how to do this and don’t have any custom webpages. Do I need to look up how to do this?
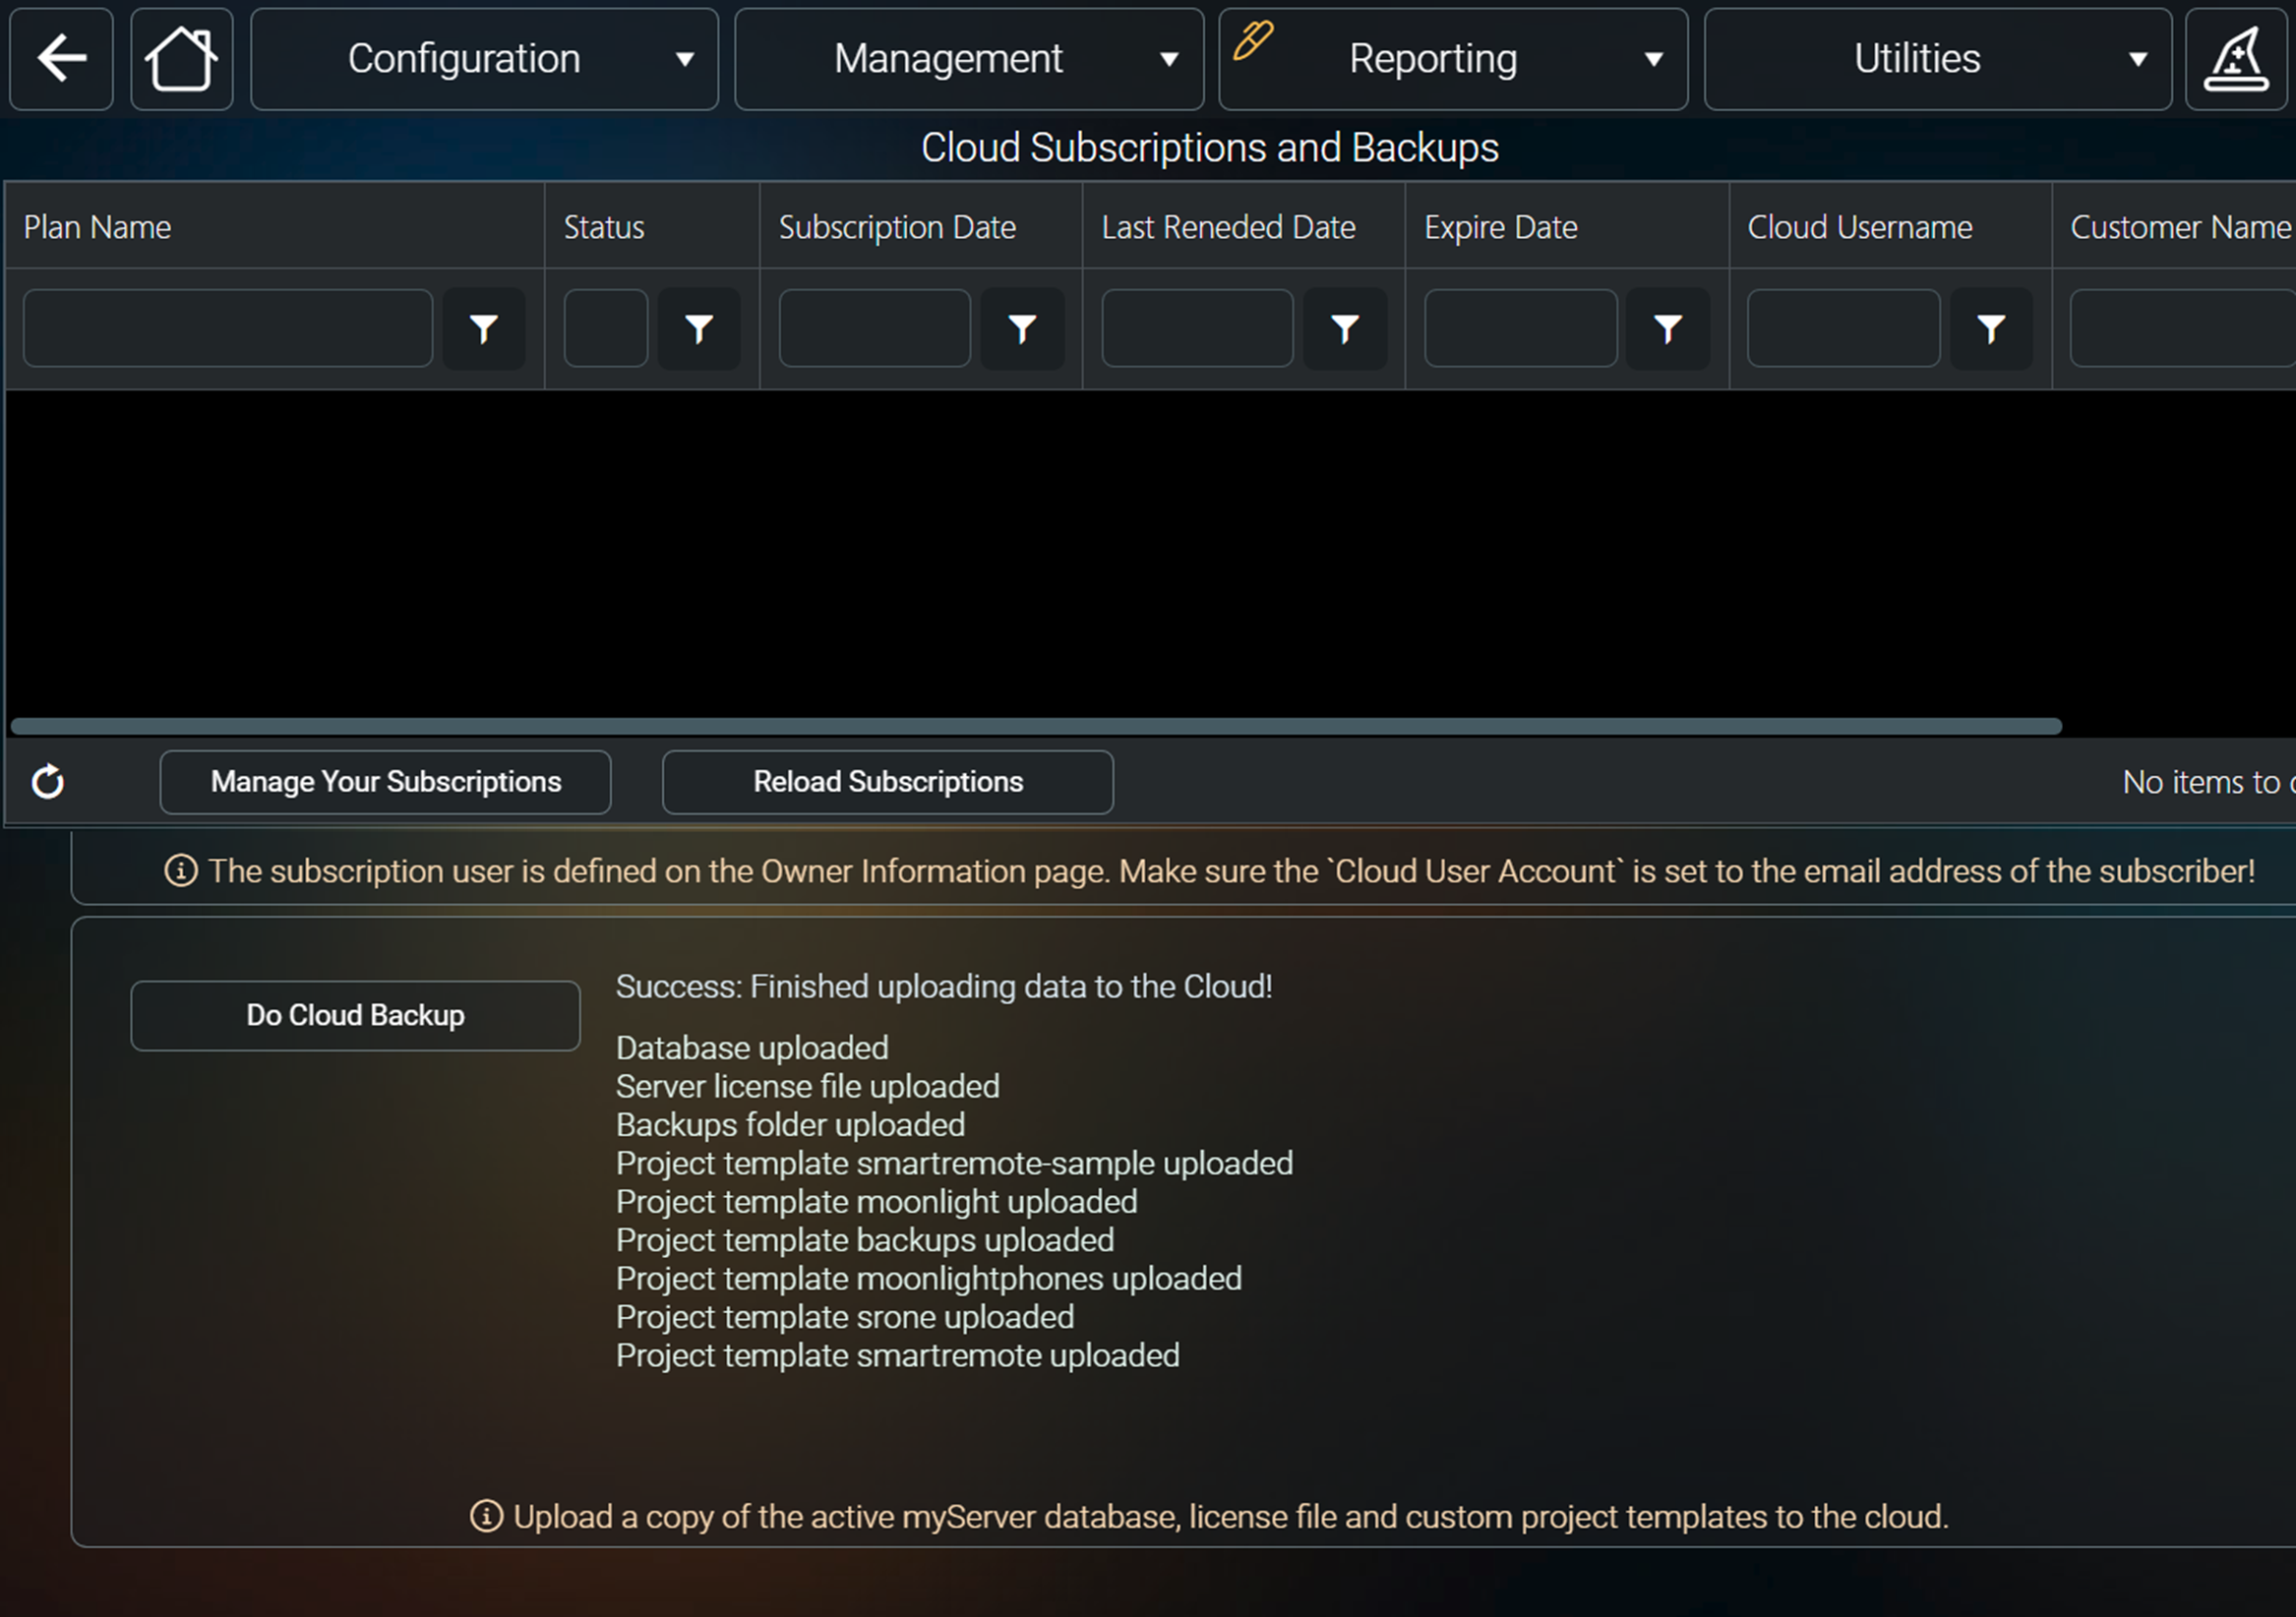
      • The only Backup Option I could find was this

Software_Backup1.jpeg

  • 4)  Restart myServer

myServer_Restart.jpeg

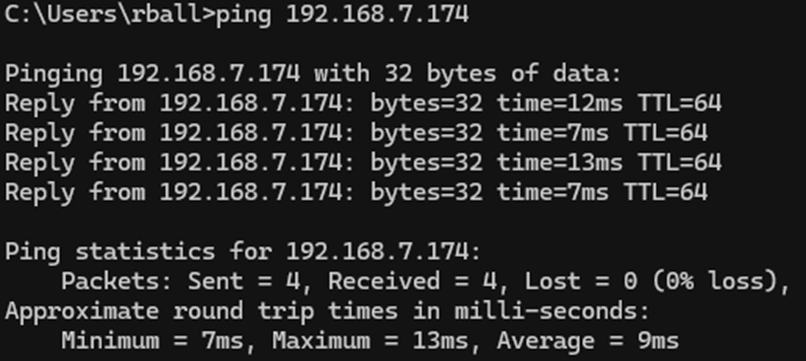
  • 5) Ensure that the SmartRemote is online.  
    • You can ping it's IP address.  
    • Ping1.jpeg
    • ***Advanced: you can do a "adb devices" from a terminal window on the myServer controller (Raspberry Pi / Linux versions only).  You should see your SmartRemote's IP on port 55055 as connected.


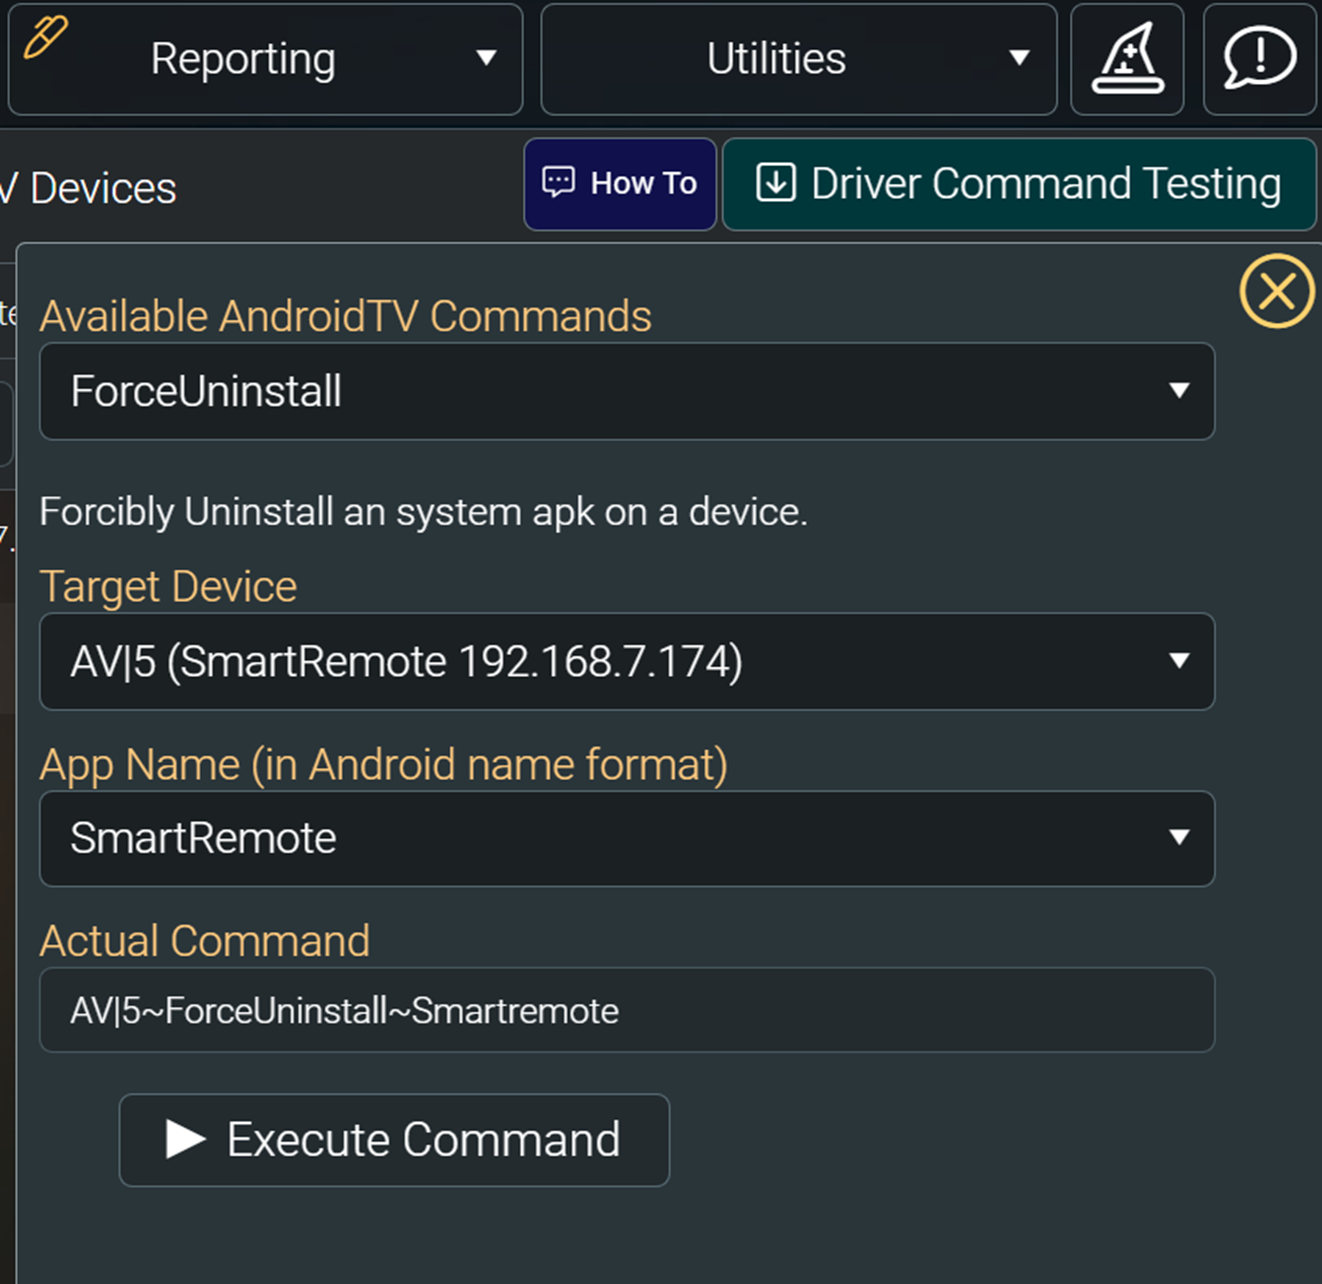
  • 6) If the apk has never been updated since new: Do this CAREFULLY: From the AndroidTV Driver Commands window, select "Forced Uninstall" and select the SmartRemote.  
    • Found at Management->Drivers->AndroidTV->Configure
    • AndroidTV_Configure1.jpeg
    • Run the command.  (Click Execute Command)
    • The SmartRemote icon will be removed, and the SmartRemote will reboot itself.  
    • Make sure you select "smartremote" so it gets included in the command to process!!!

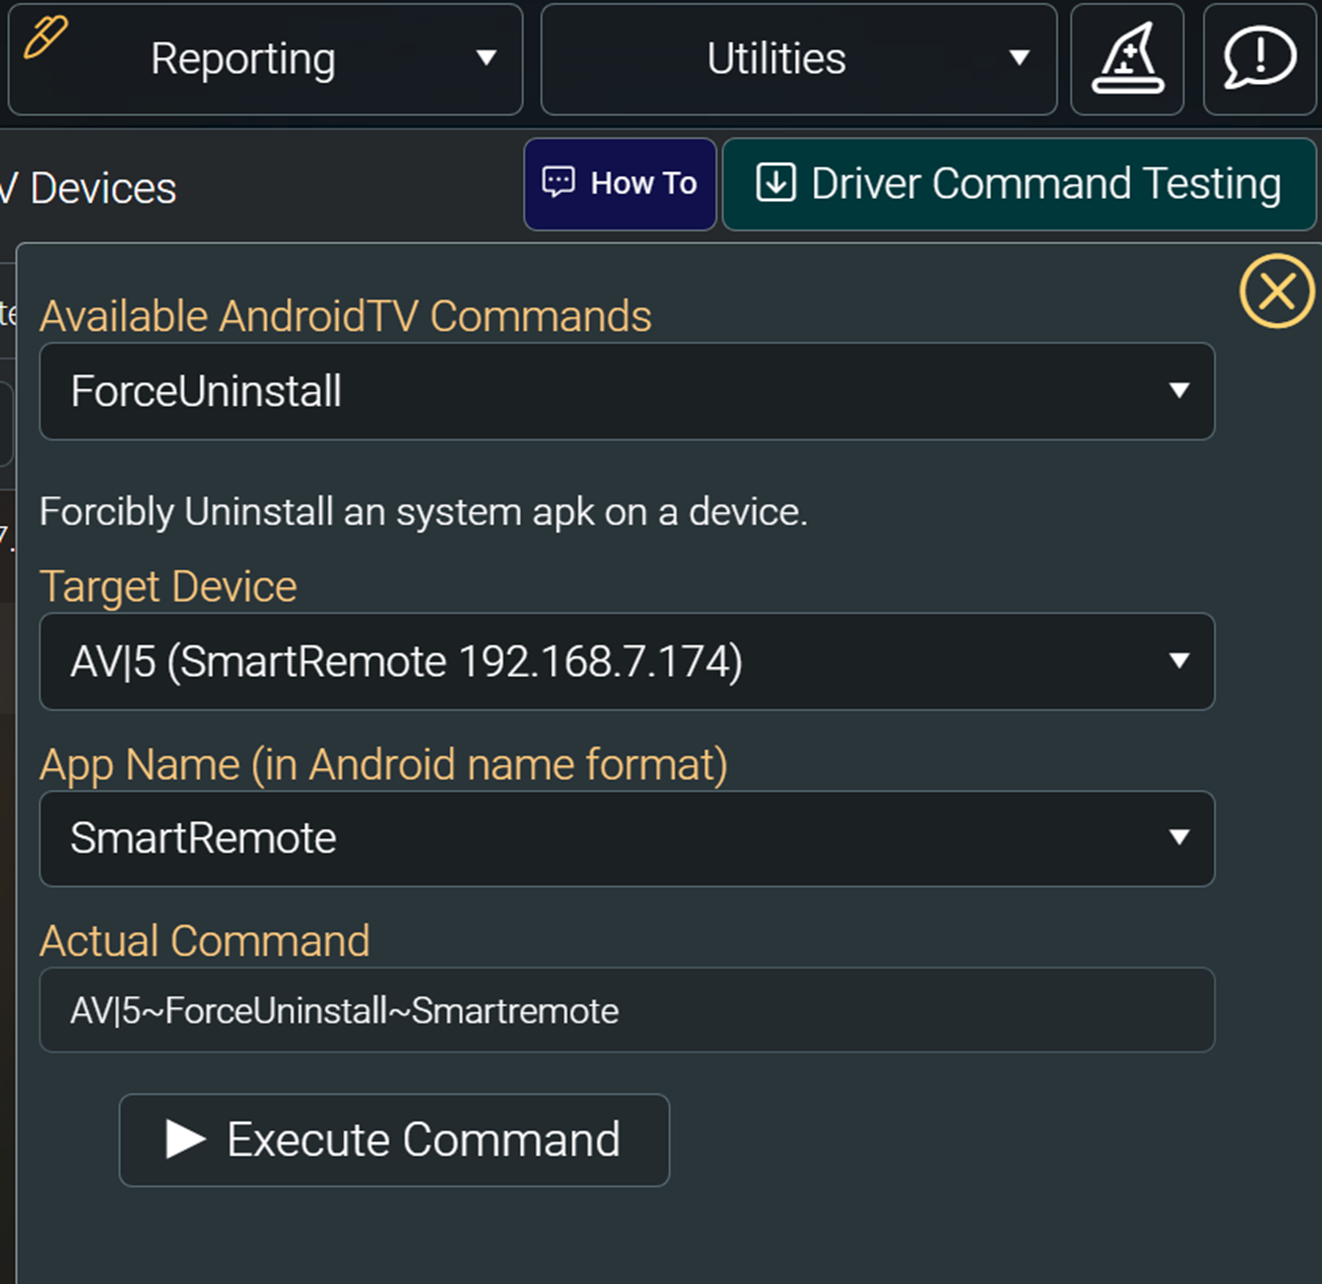
If the smartremote.apk has previously been upgraded (like to 2.0.2) then simply do an Uninstall (not a Forced Uninstall) from the AndroidTV driver command menu. Ensure you select to remove the smartremote.apk from the command drop down selections.

  • 7) After the reboot of the SmartRemote, do a "Install" from the AndroidTV Driver command list. 
    • Select smartremote as the device type.  


  • Run this command. 
    • (not sure if this is right because the instructions don’t say anything about the App Name)

AndroidTV_Configure2.jpeg

The following steps are done on the remote:


  • 8) Soon, you should see the SmartRemote app icon on the SmartRemote.  Click to launch it.


  • 9) Accept all permissions and select to add SmartRemote icon.


  • 10) Click to launch the SmartRemote Icon.  
    • You should automatically connect to your myServer instance if you had that setup as default.  
      • If there wasn't a default, then you should click to Launch myServer.


  • 11) Once the myServer smartremote home page is launched, you can click the Dot Dot Dot hard button.  
    • You will see on the smartremote settings page that you can change the timing behaviour of the hard buttons.  
    • Default is for Backlight to never turn on.  
    • Enable it to turn on the backlight when motion is detected that stays on for 15 seconds after no motion is detected.


  • 12) The backlight timing to go to sleep is an Android setting.  
    • Click on Dot Dot Dot and click on Exit SmartRemote button.  
    • Go to Settings (Android) and click on Display.  
    • Set Sleep timeout.  The default is 30 seconds.  
    • Once set, you can leave the Android Settings by clicking the SmartRemote Back button a few times.


  • 13) Launch the SmartRemote icon.  
    • Once launched to go myServer and run the "FindMyRemote|<<myremotename>>" .  
    • If the SmartRemote is sleeping (display off, but on the network), the remote will wake up (Screen and button backlight turns on) and a loud chime will be heard from the SmartRemote to assist you in locating it between the couch pillows.  
    • You can put the same command in a custom button using myDesigner if you want as well.  You might want to do this from the moonlightsmartphones or tablet user interface (since the SmartRemote is "lost")

6/26/2024: Allonis added support for the SmartRemote's backlighting of the hard buttons, revised algorithms for controlling screen on / off, and the new "Find my Remote" feature.  To enable these functions, you will need to be on latest myServer build, and latest SmartRemote Template. So, if you have a SmartRemote that is on the myServer network:

1) Install latest myServer build from myServer's Software Updater.
2) Ensure you also have latest AndroidTV Driver and have added your SmartRemote to the list of Android Devices.
3) Update to the latest SmartRemote Template.  Backup your custom webpages and change the smartremote-sampler file name to "smartremote" folder name.  You can also copy back your custom webpages from your backup.
4)  Restart myServer
5) Ensure that the SmartRemote is online.  You can ping it's IP address.  Advanced: you can do a "adb devices" from a terminal window on the myServer controller (Raspberry Pi / Linux versions only).  You should see your SmartRemote's IP on port 55055 as connected.
6) From the AndroidTV Driver Commands window, (do these steps carefully!) select "Forced Uninstall" and select the SmartRemote device ID and select the SmartRemote app from the list of possible apps to install.  Run the command.  The SmartRemote icon will be removed, and the SmartRemote will reboot itself.  Make sure you select "smartremote" so it gets included in the command to process!!!  Forced Uninstall command is only used to remove the original smartremote.apk from the SmartRemote.  Any subsequent uninstalls can be done with the "Uninstall" command which does not require a SmartRemote reboot.
7) Post reboot of the SmartRemote, do an "Install" from the AndroidTV Driver command list.  Select smartremote as the device type.  Run this command.
8) Soon, you should see the SmartRemote app icon on the SmartRemote.  Click to launch it.  If you don't see it, try swiping UP on the screen to see the list of installed applications.
9) Accept all permissions and select to add SmartRemote icon.
10) Click to launch the SmartRemote Icon.  You should automatically connect to your myServer instance if you had that setup as default.  If there wasn't a default, then you should click to Launch myServer.
11), Once the myServer smartremote home page is launched, you can click the Dot Dot Dot hard button.  You will see on the smartremote About.html page that you can change the timing behaviour of the hard buttons.  Default is for Backlight to never turn on.  Enable it to turn on the backlight when motion is detected that stays on for 15 seconds after no motion is detected.
12) The backlight timing to got to sleep is an Android settings.  Click on Dot Dot Dot and click on Exit SmartRemote button.  Go to Settings (Android OS) and click on Display.  Set Sleep timeout.  Default is 30 seconds.  Once set, you can leave the Android Settings by clicking the SmartRemote Back button a few times.
13) Launch the SmartRemote icon.  Once launched to go myServer and run the "FindMyRemote|<<myremotename>>" .  If the SmartRemote is sleeping (display off, but on the network), the remote will wake up (Screen and button backlight turns on) and a loud chime will be heard from the SmartRemote to assist you in locating it between the couch pillows.  You can put same command in a custom button using myDesigner if you want as well.  You might want to do this from the moonlightsmartphones or tablet user interface (since the SmartRemote is "lost").


Troubleshooting

If the SmartRemote loads to the Android Desktop, wait until the smartremote.apk auto launches.  Sometimes this can take a few seconds.

Once it loads, if there is no Auto Launch settings configured, you should see the settings tab.

If the project launches "to a white page", then that's likely because you don't have your myServer IP and the smartremote folder properly configured.  You can wipe all of these settings by clearing data/ cache in the smartremote.apk in the Android Desktop's Apps page.

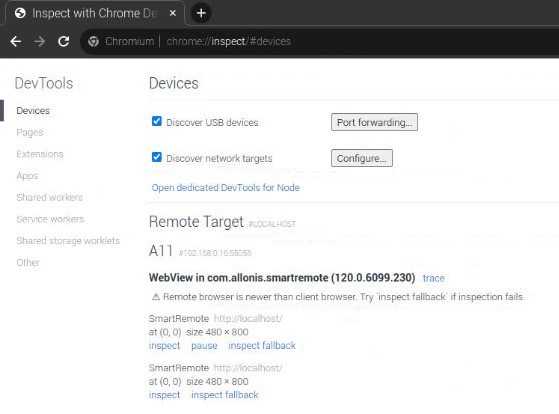
You might not be able to reach the AndroidOS desktop to clean data.  If this is the case, myServer Pi needs to have ADB access.  This can be done within myServer's AndroidTV app (add the SmartRemote IP to the list of Android devices - which adds ADB connection to it).  You can also from a terminal session, type: "adb connect 192.168.1.48:55055" (use your IP address). Then, in Chrome (on the myServer controller), go to "chrome://inspect"  You should see the SmartRemote listed in the list of ADB connected devices.   Click "inspect" link in the SmartRemote's Remote Target section.

Chrome inspect 1


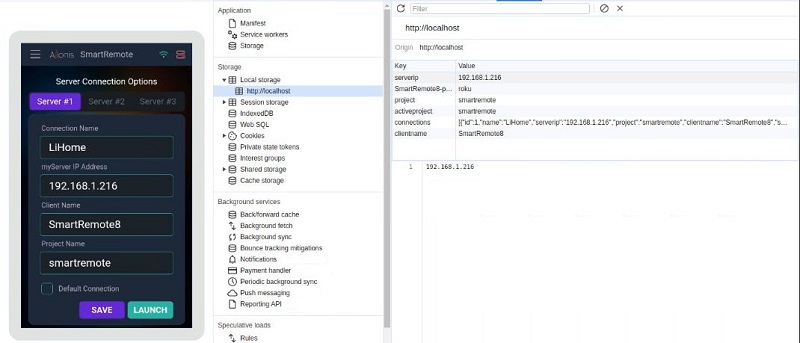
Go to the Apps tab and click the Application Tab.

You can adjust the myServer IP address and the project name (the myServer smartremote folder) as well as change the SmartRemote's computer name.

 Chrome inspect 2

 SmartRemotes that are "off" in AndroidTVDriver will not show in Screencast view in Inspect. Turn it ON and it displays. So, the remote might be asleep.

Requirements:

  • SmartRemote (one or more)
  • SmartRemote Charging Hub and Micro USB charger (you can turn the ring light off using the button switch on the bottom of the hub)
  • Wifi Access Point (not included in basic kit)
  • myServer automation controller
  • AndroidTV Driver installed on myServer (from Software Updater)
  • SmartRemote user interface tempate (like "MoonLight SmartRemote").  Note, the smartremote-sample folder name is what downloads from myServer's Software Updater.  This needs to be changed to "smartremote" if your Settings specifies "smartremote".  You can use myDesigner to change the name, or File Explorer on Windows ("//myservername/wwwroot") from a network connected Windows PC, or directly via Raspberry OS File Manager (if you have a keyboard / mouse /monitor connected to myServer Controller).  You can even manage the file names using commands issued in the myServer's Dashboard Terminal Window application.

FAQ

  • How long will the battery last?  We see times of about 12 hours with the remote off of charge and in Dim mode.  If you are actively using the remote, the time can be less.  Simply dock the remote inbetween use sessions.
  • Why doesn't the display go black?  This has been addressed by an update to the smartremote.apk (the app that runs on the SmartRemote).  Update this via the latest myServer, latest AndroidTV driver, and to ForceUninstall the old apk and Install the new smartremote.apk.
  • How do I close the SmartRemote app? Simply Long press the Home button to get to the smartremote folder's home page.  Then, click the "dot dot dot" hard button.  Click the Exit SmartRemote button.
  • Functionality for short press, long press and numlock on the hard buttons:
    single click = short press
    press for 1 second = long press
    press home for 3 seconds = toggles numlock.

Advanced:

You can set a clientname / folder / myServer address in a client device (like SmartRemote) by running a command like:

ClientCmd|SetLaunchProperties|<project name>~<server ip>~<clientname>
Example:  ClientCmd|SetLaunchProperties|smartremote~192.168.1.216~smartremote8

When that macro is run, myServer reconfigures the client to connect to a different myServer instance - like when moving your SmartRemote from House to RV networks!


Your "smartremote" web folder:

You can create a "wwwroot/backups" directory and put your old (but maybe customized?) folder in there, and rename the latest smartremote-sample to smartremote
Then you are using the out of the box latest.
You move the old project folder out of wwwroot so they don't consume software licenses needed.

You should also clear Cache in all browsers (including myServer chrome).
You should exit the smartremote.apk and restart it to clear the SmartRemote's cache to load the latest javascript in the new -sample
You can then selectively bring in your custom webpages (david-office.html) into the new smartremote project folder.

Note - you can also rename smartremote to "davidhouse" and then use the second SmartRemote Settings connection tab to point to kylehouse folder.  Deselect Default connections so everytime the SmartRemote.apk launches, you choose which connection settings to use (Tab 2 for the example) and you then launch the custom kylehouse project folder.


Subcategories

SmartRemote Screen Protector

Search

Documentation
Hardware
SmartRemote1
SmartRemote Screen Protector1
SmartRemote Screen Protector
SmartRemote - Getting Started
Business Related Info
About Us6
Ric Swika
Dr. Jeff Jacob
Dave Perrico - CTO
David Li
Ed Tremko
About Us
Allonis Hardware and Support1
Allonis LLC hardware warranty and support
Become an Integrator1
Become an Integrator
Copyright notices and licenses for Open Source Software1
Copyright notices and licenses for Open Source Software
License Transfers1
License Transfers
Payment Options and other Ordering FAQ1
Payment Options and other Ordering FAQ
Privacy policy1
Privacy policy
Streaming TV for my Bar / Restaurant1
Streaming TV for my Bar / Restaurant
System Licensing1
Getting Started - Trial and Licensed Software
Getting Started
Common Tasks
Audio / Video Integration for Audio1
Audio / Video Integration for Audio
Audio / Video Integration for Video1
Audio / Video Integration for Video
Remote Programming - How it Works1
Remote Programming - How it Works
File Storage FAQ1
File Storage FAQ
Music Streamers1
Music Streamers
myButton: Play an audio file upon pressing a Panic button1
myButton: Play an audio file upon pressing a Panic button
Sending SMS messages from myServer1
Sending SMS messages from myServer
Television Control1
Television Control
Troubleshooting1
4K 60 Hz HDCP 2.3 / 2.2 to HDCP 1.4 Converter / Downgrader1
4K 60 Hz HDCP 2.3 / 2.2 to HDCP 1.4 Converter / Downgrader
Downgrading Linux Kernel
Network Management1
Networking FAQ1
Networking FAQ
Setting a Static IP address1
Setting a Raspberry PI to a Static IP address
Networking - Connect to a Device Default IP address1
Networking - Connect to a Device Default IP address
Accessing myServer from the Internet1
Accessing myServer from the Internet
myServer 6 Router1
myServer Router
myFirewall Installation1
myFirewall Installation
Network Switches1
Network 24 and 48 Port 10G L3 Managed Switch (Rack)1
Network 24 and 48 Port 10G L3 Managed Switch (Rack)
Network Switches
Network Security - myFirewall21
Network Security - myFirewall2
Network Security - myFirewall41
Network Security - myFirewall4
WiFi Router Configuration1
WiFi Router Configuration
QR Code support via myServer 61
QR Code support via myServer 6
VLAN Network Setup1
VLAN Network Setup
VLAN Allonis L3 Switch Network Setup1
Allonis L3 Switches - VLAN Configuration
VLAN Support on myServer 6 Controllers - Raspberry Pi41
VLAN Support on myServer 6 Controllers - Raspberry Pi4
TeamViewer1
TeamViewer
RustDesk Remote Desktop1
RustDesk Remote Desktop
Wifi 2 Ethernet Adapter1
Wifi 2 Ethernet Adapter
Basic Network Setup
myServer 61
myServer Setup
Installation2
myServer Startup2
TVBox Master Image Installation
myServer Startup
myServer Configuration1
myServer Configuration
myServer Configuration - 21
myServer Configuration - Part 2
Sports Bar Project Process1
Sports Bar Project Process
myServer 6 Controller Installation1
myServer - Installation - Pi4
Adding Rooms to myServer1
myServer - Adding Rooms
Adding Lighting1
myServer - Adding Lighting
myServer 6 - Master Image Installation1
myServer Master Image Installation
Find.myServer.fyi1
Find.myServer.fyi
Flashing Pi CM4 using the IO Board1
Flashing Pi CM4 using the IO Board
Migrating to myServer 6 From Previous Versions1
Migrating to myServer From Previous Versions
MultiZone Audio Design - Commercial1
MultiZone Audio Design - Commercial
myServer 6 Installation on Mint OS1
myServer Installation on Mint OS
myServer 6 Installation on Windows OS1
myServer Installation on Windows OS
myServer 6 USB Installation1
myServer USB Installation
Networking Basics1
Networking Basics
Creating a Bootable Image on SDMicro and USB1
Creating a Bootable Image on SDMicro and USB
myServer Virtual Environment Installation1
myServer Virtual Environment Installation
myServer Scheduled Tasks
myServer Master Image Installation TVBox
myServer 6 Automation Events1
myServer Automation Events
myServer 6 Command Syntax1
myServer Command Syntax
Macros - Naming Convention1
Macros - Naming Convention
myServer Backup and Restore1
myServer Backup and Restore
Core System Capabilities
MQTT
Broker
Certificate
Discovery
myServer Device Discovery1
myServer Device Discovery
Testing your Setup
Logging
myServer 6 Hardware
myServer 6 1.5U Rack Mount Hardware1
myServer - 1.5U Rack Mount
myServer 6 Shelf Mount1
myServer - Shelf Mount
myServer Features1
myServer Features
How To
User Interface Scene Transitions1
myServer Scene Transitions How To
Connecting to myServer for Troubleshooting
Advanced Configuration
Authentication
Remote Access
Master Image Updates1
Master Image Updates
3rd Party Automation System Integration
Home Automation Overview1
Home Automation Overview
HomeAssistant Gateway Driver1
HomeAssistant Integration
Homeseer Driver Installation
Node Red - Installation1
Node Red - Installation
Why Automate your Home or Business1
Why Automate your Home or Business
QSC Core Driver1
QSC Core Driver
Applets
TVListings App1
TV Listings - App
Weather App Installation1
Weather App Installation
Drivers1
Amplifiers
Audio Matrix
AES67 Audio IP Networking Overview1
What is AES67?
Allen and Heath Audio Matrix Driver1
Allen and Heath Audio Matrix Driver
Atlas Atmosphere Audio Driver1
Atlas Atmosphere Audio Driver
AVPro ACMax24A Audio Matrix1
AVPro ACMax24A Audio Matrix
BSS-100 Driver1
BSS-100 Driver
DBX - Driver1
DBX - Driver
DBX640 - Driver1
DBX640 - Driver
MonoPrice Blackbird Driver1
MonoPrice Blackbird Driver
MRC88 Audio Matrix Driver1
MRC88 Audio Matrix Driver
QSC Audio Driver1
QSC Audio Driver
RTIADx Audio Driver1
RTIADx Audio Driver
Russound Rio Driver1
Russound Rio Driver
Russound RNET Audio Driver1
Russound RNET Audio Driver
Wiring: Connecting RCA audio jacks to Phoenix Connectors1
Wiring: Connecting audio jacks to Phoenix Connectors
DSP444 AES67 Audio over IP Driver1
DSP444 4x4x4 audio processor
DSP4428 AES67 Audio over IP Driver1
DSP4428 4x4x28 audio processor
AES67 Virtual Windows Sound Card1
AES67 Virtual Windows Sound Card
Audio Video Receivers
Anthem AVR Driver1
Anthem Driver
Denon Driver1
Denon Driver Installation
Integra AV Receiver Driver1
Integra AV Receiver Driver
Marantz AudioVideo Receiver Driver1
Marantz AudioVideo Receiver Driver
Onkyo AVR Driver1
Onkyo AV Receiver Driver
Blinds
Lutron Blinds1
Lutron Blinds
Somfy RS485 Blinds1
Somfy RS485 Blinds
Somfy Synergy UAI+ Blinds1
Somfy Synergy UAI+ Blinds
Somfy Z-Wave Blinds1
Somfy Z-Wave Blinds
TRO.Y Blinds Controller Driver1
Screen Innovations TRO.Y Blind Control Driver
Bond Bridge - Shades1
Bond Bridge
Camera
BlueIris Camera NVR1
BlueIris Camera NVR
Hikvision IP PTZ Camera Setup1
Hikvision IP PTZ Camera Setup
IP Camera Integration1
IP Camera PTZ Driver1
IP Camera PTZ Driver
iP Camera Integration
Lumens Camera Driver1
Lumens Camera Driver
Ubiquiti IP Camera Setup1
Ubiquiti Camera Setup
Samsung NVR Driver1
Samsung NVR Driver
Armcrest IP Cameras1
Armcrest IP Cameras
IPCamera Wyze Integration1
Wyze Camera Integration
Contact / Motion Sensor
Control Device
Harmony Hub Driver1
Harmony Hub Driver
MyQ Garage Door Opener1
MyQ Garage Door Opener
Tablet Power Solutions1
Tablet Power Solutions
Infrared Control1
Infrared Control
UPS Monitor Driver1
UPS Monitor Driver
UPS myServer Pi Driver1
UPS myServer PI Driver
VideoStorm irUSB1
VideoStorm irUSB
Elgato Stream Deck1
Elgato Stream Deck
Shotbox Driver1
ShotBox Driver
Ratgdo Garage Door Control1
Ratgdo Garage Door Control
myIR1 WiFi to Infrared1
myIR1 WiFi to Infrared
myAtom1
myAtom
Energy
AccuEnergy Driver1
AccuEnergy Driver
Fan
Bond Bridge - Fans
Intercom
Keypad
Lighting
DMX Lighting1
DMX Lighting
Lutron Caseta Driver1
Lutron Caseta Driver
Lutron Driver1
Lutron Driver
Phillips Hue Driver1
Phillips Hue Driver
Lighting Sim Driver1
Lighting Sim Driver
Powerline DMX Pool Lighting1
Powerline DMX Pool Light Control
Shelly Automation Device Driver1
Shelly Device Driver
Media Player
Android V2 Driver2
Android V2 Driver
AndroidTV Driver
AppleTV control1
AppleTV control
Blu100 Driver1
Blu100 Driver
BluRay Player IR Control1
BlueRay IR Driver Installation
Cable TV - IR1
CableTV Driver
DLNA Media Player Driver Installation1
DLNA Media Player Driver Installation
Emby Media Server Configuration1
Emby Media Server Configuration
eStream4K Device Using IR1
eStream4K Device Using IR
FireTV 4K Installation1
FireTV 4K Installation
HEOS Driver1
HEOS Driver
Kodi Application1
Kodi Application
Live Streamer Driver1
Live Streamer Driver
MediaMatrix Streaming Media Driver1
MediaMatrix Streaming Media Driver
MediaPlayer Audio Amp1
MediaPlayer Audio Amp
myAudioPlayer1
myAudioPlayer
myMediaPlayer1
myMediaPlayer
Oppo Blu-Ray Player Driver1
Oppo Blu-Ray Player Driver
Roku Player Control1
Roku Player Control
Streaming Media Hardware Comparison1
Streaming Media Hardware Comparison
Streaming Music for Commercial Implementations1
Streaming Music for Commercial Implementations
Sony X1000 BluRay Driver1
Sony X1000 BluRay Driver
Tivo Player Driver1
Tivo Player Driver
Sonos Driver1
Sonos Driver
Zidoo Media Players1
Zidoo Media Players
Xfinity IP Driver1
Xfinity IP Driver
MediaEngine App1
MediaEngine App
Media Service
TuneIn Application
Pool
Jandy Pools1
Jandy Pools
Projector
Optoma Projector Driver1
Optoma Projector Driver
PJLink Driver1
PJLink Driver
BenQ Projector Driver1
BenQ Projector Driver
Mitsubishi Projector Driver1
Mitsubishi Projector Driver
NEC Projector Driver1
NEC Projector Driver
Sony Projector
Vivitek Projector Driver1
Vivitek Projector Driver
JVC Projector Driver1
JVC Projector Driver
Sony VPL Projector Driver1
Sony VPL Projector
JVC LX-NZ30 Projector Driver1
JVC LX-NZ30 Projector Driver
Receiver
Relay
Digital Loggers1
Digital Loggers Relay Driver
Dingtian Relay Driver1
Dingtian Relay Driver
Electronic Salon GPIO Relay1
Electronic Salon GPIO Relay
iMatic Relay Driver1
iMatic Relay Driver
Satellite
DirecTV Driver1
DirecTV Driver
Dish Network Driver1
DISH Network Driver
Security System
DSC Security System Driver1
DSC Security System Driver
ELK Driver Installation and Use1
ELK Driver Installation and Use
Security Simulator Driver1
Security Simulator Driver
Honeywell Security1
Honeywell Security
Outdoor Grill Integration
Traeger Grill Integration
Green Mountain Grill Driver
Sensor
1-Wire Temperature Sensor1
1-Wire Temperature Sensor
GPS Receiver Driver1
GPS Receiver Driver
Water Tank Level Sensing1
Water Tank Level Sensing
Television / Monitor
Controlling TVs via CEC1
Controlling TVs via CEC
Generic TVIR2
Generic TVIR Driver
Infrared TV Control
HiSense TV Control1
HiSense TV Control
NoHassle TV Driver1
NoHassle TV Driver
Insignia TV Control1
Insignia TV Control
LG TV Driver1
LG TV Driver
LGWebOS Driver1
LG WebOS Driver
Samsung BET Driver1
Samsung BET Driver
Samsung Signage TV Driver1
Samsung Signage TV Driver
Samsung Tizen TV Driver1
Samsung Tizen TV Driver
Samsung TV Driver1
Samsung TV Driver
Sony TV Driver1
Sony TV Control
Sharp TV Driver1
Sharp TV Driver
Sunbrite TV Driver1
Sunbrite TV Driver
Viewsonic TV Driver1
Viewsonic TV Driver
PJLink Driver1
PJLink Driver
TCL TV Driver1
TCL TV Driver
Peerless TV Driver1
Peerless TV Driver
Vizio TV Driver1
Vizio TV Driver
Thermostat
Climate Simulator1
Climate Simulator Driver
EcoBee Thermostat1
EcoBee Thermostat
Venstar Thermostat Driver1
Venstar Thermostat Driver
Tuner
Video Matrix
Video Wall Control1
Video Wall Control
AVPro QuadView Driver1
AVPro QuadView Driver
AVPro Video Matrix2
AVPro MXNet Driver
AVPro Driver
ANeuVideo Driver1
ANeuVideo Driver
Brightlink Video Switcher1
Brightlink Video Switcher
Factor A8 Matrix Switch Driver1
Factor A8 Matrix Switch Driver
HDTV HDBaseT Driver1
HDTV HDBaseT Driver
HDTV Video over IP Driver1
HDTV Video over IP Driver
AVOIP 4K Driver1
AVOIP900 Video Over IP 4K Driver
HDMI 36x36 Video Matrix1
HDMI 36x36 Video Matrix
HDMI Matrix Basics1
HDMI Matrix Basics
HDTV HDBitT Driver1
HDTV HDBitT Driver
HDTV Quad Driver1
HDTV Quad Driver
Just Add Power Driver1
Just Add Power Driver
Knox Video Switcher Driver1
Knox Video Switcher Driver
MOiP Video Matrix Driver1
MOiP Video Matrix Driver
Shinybow Video Driver1
Shinybow Video Driver
JTech Video Over IP ZTIP3001
JTech / Zenty Video Over IP IP300 Driver
Connectivity Technologies
CAN Driver1
CAN Driver
Connecting Bluetooth Devices to a Windows PC1
Connecting Bluetooth Devices to a Windows PC
Controlling a Water Valve via Tasmota Relay1
Controlling a Water Valve via Tasmota Relay
DMX
DMX - PKNight Art-Net controller setup1
DMX - PKNight Art-Net controller setup
Art-Net DMX Driver1
DMX - ArtNet Driver
GenericGPIO Relay Driver1
GenericGPIO Relay Driver
Generic Modbus Driver1
Generic Modbus Driver
Generic Serial Driver1
Generic Serial Driver
GlobalCache Driver1
GlobalCache Driver
IFTTT Configuration1
IFTTT Configuration
Infrared Control2
GenericIR Driver
Controlling devices via Infrared
Matter1
Matter - Does it matter?
MQTT Use1
MQTT Use
OBD/VIC Driver1
OBD/VIC Driver
OLA Service Monitor1
OLA Service Monitor
Raspberry BLE Device Driver1
Raspberry BLE Device Driver
Relays - IP controlled1
Relays - IP controlled
Sainsmart IP Relay Driver1
Sainsmart IP Relay Driver
Serial to Net for Pi Installation1
Serial to Net for Pi Installation
Sonoff Devices1
Sonoff Devices
Tasmota1
Tasmota
UPB Lighting Driver1
UPB Lighting Driver
Waveshare GPIO Relay Driver1
Waveshare GPIO Relay Driver
Zigbee Driver1
Zigbee Driver
Z-Wave JSUI Driver1
Z-Wave JSUI Driver
ZWay Raz Driver1
ZWay Raz Driver Installation
ESP32 Projects
ESP32 Doorbell Camera
ESP32 - Rotary Encoder1
ESP32 - Rotary Encoder
Allonis L3 Managed Switch Driver1
Allonis L3 Managed Switch Driver
Atomic IP2IR Driver1
Atomic IP2IR Driver
Drivers
User Interfaces
myDesigner 6
myDesigner 61
myDesigner
myDesigner 6 Installation1
myDesigner Installation
myDesigner 6 Useage1
myDesigner 6 Useage
Administrator Template1
Administrator Template
Modern
Modern Template - Phones1
Modern Template - Phones
Modern Template - Tablets1
Modern Template - Tablets
Moonlight
Moonlight Template Strategy1
Moonlight Template Design Strategy
Moonlight - SmartRemote1
Moonlight - SmartRemote
Moonlight - SmartPhone1
Moonlight - SmartPhone
Moonlight - Tablet1
Moonlight - Tablet
Sheer Template
Sheer Template - Phones1
Sheer Template - Phones
Sheer Template - Tablets1
Sheer Template - Tablets
SportsBar
SportsBar - Tablet1
SportsBar Template - Tablet
SportsBar - SmartPhone1
SportsBar Template - Phones
TV Placement1
Sports Bar TV placement
Browser Compatibility1
Browser Compatibility
Adding Grafana Charting into your UI1
Adding Grafana Charting into your UI
Device Networking1
Device Networking
iPort Surface Mounts1
iPort Surface Mounts
Setting up a Tablet for myServer 6 Templates1
Setting up a Tablet for myServer Templates
Setting up an iPad / iPhone for system access1
Setting up an iPad / iPhone for system access
Tools and Helpers
Developer Tools
Driver Examples

 allonis logo 700

4078 Waterland Drive Metamora, MI 48455

248-918-0123

info@allonis.com

    Copyright © 2026 Allonis. All Rights Reserved.
    Allonis LLC