

About
Allonis myDesigner 6
myDesigner 6 allows you to build Web Applications that will run full screen on any supported device. You get all the benefits of a "native" application with the added ability of a rich design environment. No resident code ("App") is required on the user interface device as myServer is a modern webserver architecture.
Used in conjunction with myServer, the Allonis myDesigner is used to create stunning automation interfaces on any desktop browser, Android or Apple tablet, phones, and Allonis's SmartScreen, SmartSwitch and SmartRemote products. All modern mobile devices are supported.
YouTube tutorials are HERE.
This myDesigner supports the following features:
- Design scenes for any modern Android table and phone
- Design scenes for all Apple iOS devices
- Simple Drag and Drop scene builder
- Live preview while designing
- Context sensitive object editing. Only see the properties that apply to the object being edited
- Manage multiple projects across multiple devices
- myDesigner 6 is in Beta but used for several years by Allonis's UI team to develop industry leading systems. Both the application AND this documentation is incomplete and will be continually updated as features are added (ongoing).
System Requirements
- Microsoft Windows PC. (32 or 64 bit versions.)
- modern dual-core processor
- 2GB main memory. (4GB or more recommended)
- 1GB free disk space
- myServer version 6.7x
- Suitable target device for testing
- myServer Network settings with correct IP Address and User Web Server Enabled.
- If post installation the UI doesn't render correctly, check that you don't have display scaling other than 100%.
Please make sure to check the settings on your myServer and make sure that you have set the DNS name to the IP Address of your myServer PC. Also make sure you have the User Web server enabled. See the following image.
Installation
Follow these install directions
Ensure you are using the very latest myDesigner by updating it within myDesigner. Do this before updating any web projects. Ensure you are also on the latest myServer so all are compatible.
The web apps are, by design, not user scalable. They are designed to automatically scale to fit the screen of the device they are running on. If the scaled scenes are too small then you would have to redo them to fit the scaling that is appropriate for the phone.
Creating A New Project
To get started the first thing you want to do is create a new project. Click on the "New Project" button from the main menu. You will be presented with the Project Name and Properties dialogs. Fill out the forms with the appropriate settings for your application.
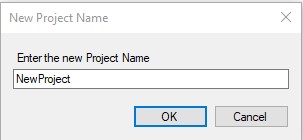
Enter the name of the folder where you want your new project to live. Note that on Linux systems, all project names must be lower case. This will become a sub-folder of the HTML folder on your myServer PC. When you click the OK button there will be a slight pause as the myDesigner copies the files from the sample project into the new project folder.
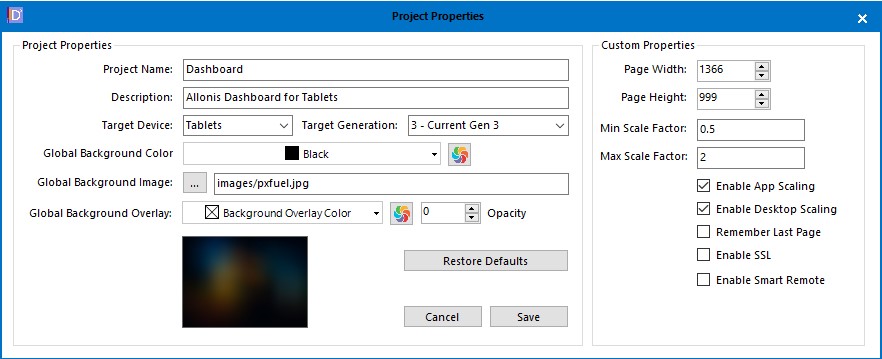
- Project Name: A distinctive name for your project
- Description: (Optional) Text that helps describe this project
- Target Device: Select the device that you will be designing for. This will define the base geometry, width and height) for the scenes you will be designing. If your device is not in the list please let us know and simply select the "Custom" option and then manually enter the height and width of your device in pixels.
- Default Background Color: This is the background color that all your scenes will start with.
- Background Image: If you would rather have a colorful background image as your default then click on the ... button and browse for the image you would like to use. Or simply drag and drop your image onto the image placeholder on the dialog.
Press Save to create your new project.
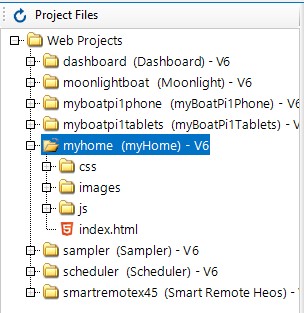
A new folder will have been created on the server with the name you specified. It will also be contain several sub-folders called css, images and javascript. Do not rename these folders and also do not delete or rename any of the files in the css and javascript sub-folders unless they are ones that you created. The myDesigner requires these folders and core files.
Creating A New Scene
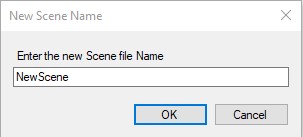
Now you are ready to start creating scenes. Highlight the active project on the Project Files tree view and click on the "New Scene" button of main menu bar. Enter the name of your new scene file (All scene files must have the extension .html or .htm!). You'll be presented with the new blank canvas.
You are now ready to start adding objects to the scene. Click on the "Insertable Objects" button on the main menu bar to expose the objects collection.

Scene Properties
Once the scene is open you can click on the scene properties button on the scene toolbar to display the scene properties dialog. From this dialog you can specify a new background color or image for the scene that overrides the default values. You can also define up to 5 additional overlay scenes to be included with this scene. Overlays are useful when you want to implement popup objects and other advanced scene designs.
This is where you can specify any myServer commands that should be executed when the scene loads.

Scene Properties
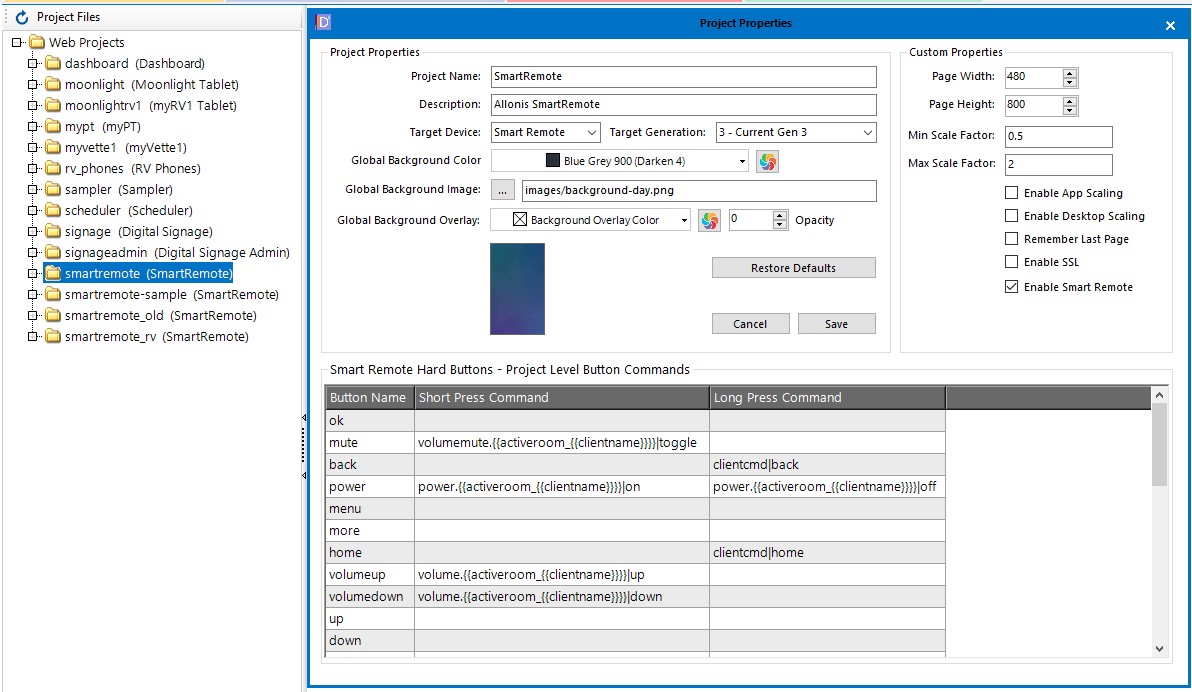
Designing how buttons work for the SmartRemote
If you click on the web project name and click Properties buttons, you can edit the global project level hard button commands for both Short and Long press.
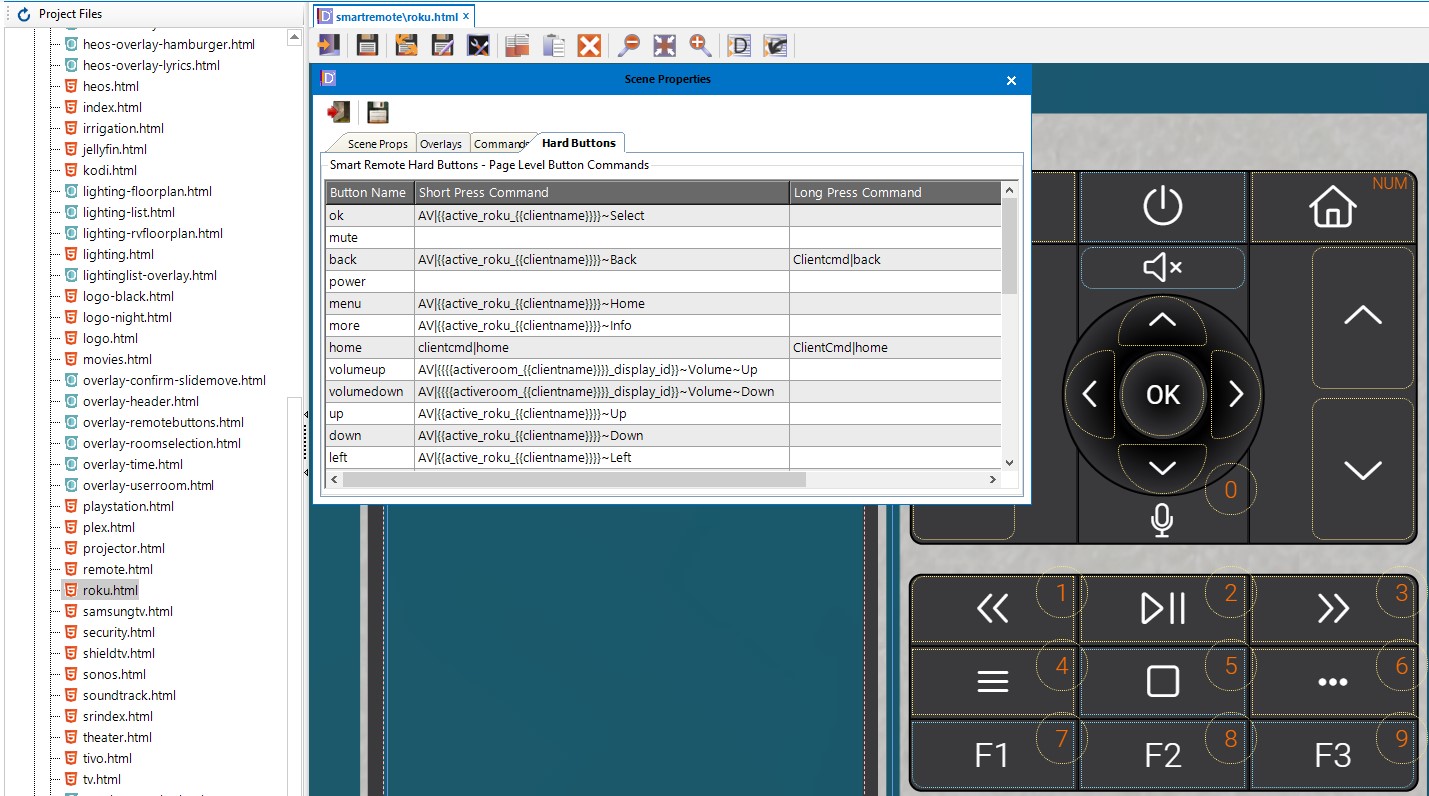
If you modify commands on a specific webpage, they override the Project Level commands when that page is loaded on the SmartRemote:
Scene Objects
Designing scenes all revolves around dragging and dropping objects from the collection of insertable objects onto the scene being edited. Once an object is on the scene it is just a matter of right-clicking on it to define the object parameters. The collection of objects will continually be enhanced as the product evolves. The initial release will provides these eight objects for building the scenes.

Adding and Editing Objects
To add an object to the scene it is as simple as dragging the image of the object you want to add from the collection of insertable objects onto the scene. The object will be added to the scene close to where the mouse pointer was when you released the button. Once an object is on the scene you can click and drag it anywhere you like. A single click on the object will highlight it and make it eligible for editing. You can click on multiple objects to select a group and then you can use the cursor keys to fine tune their positions on the scene.
To edit the properties of an object make sure you only have one object highlighted and then right-click on the object and select the "Object Properties" option from the context menu. Every object has its own unique properties associated with it. They will be described in the following sections.
The Panel Object
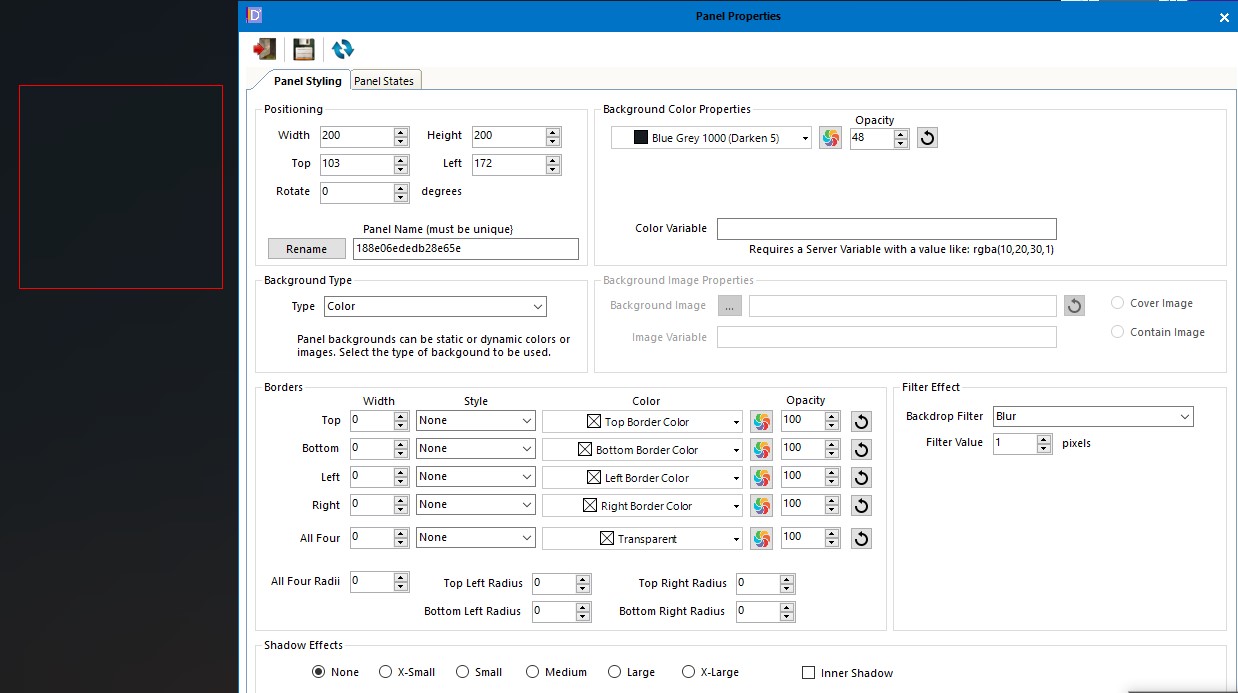
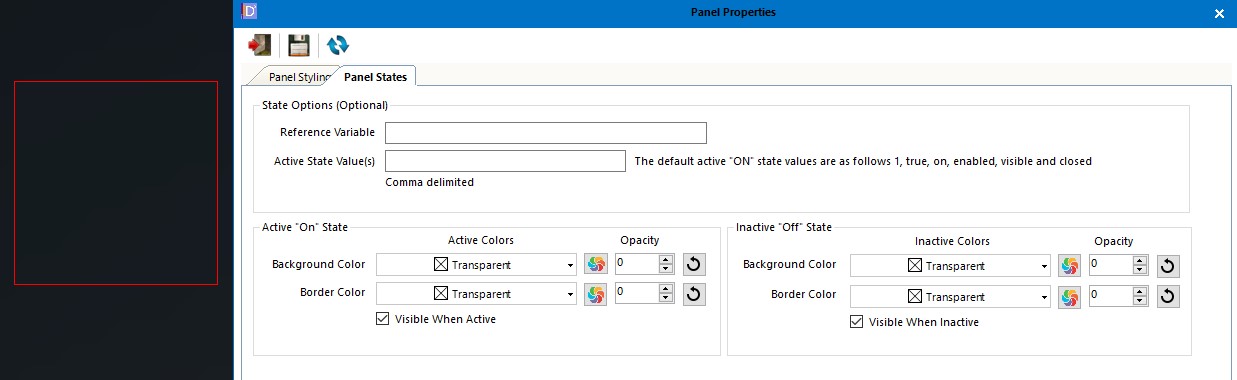
A Panel object is meant to be used as a background element on your scenes. You have full control over color and alpha (opacity) along with styling options like size, position and corner radii.
The Text Object
Text objects are meant to be used as labels or multi-line blocks of text. You have full control over the look and feel of the text displayed. Feel free to embed server variables on the text line. Add the server variables using the standard {{variable_name}} convention.

You can use myDesigner tools to only display text if a variable condition is met (like only show "Thunderstorms Nearby" if that's true). Just set the main label color to "red". Then, in the State Field, hide when active (0) and show otherwise.
The Image Object
Image objects are used to display the images created via myServer or your own custom images. Drag new images onto the placeholder on the properties dialog or browse for them. If the image is generated by myServer set the path to the image using the appropriate server variable names.

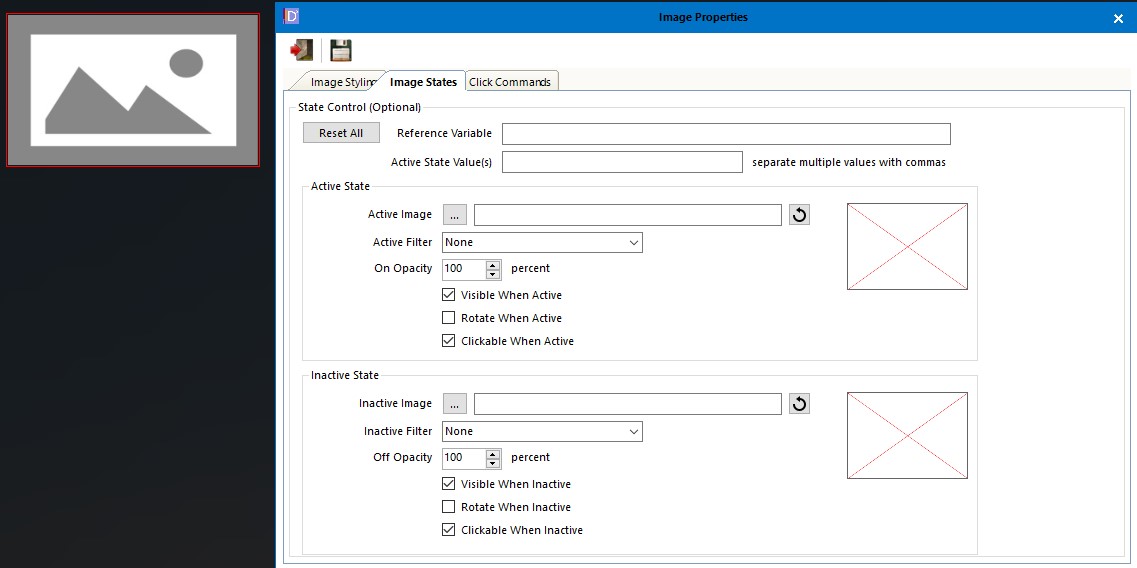
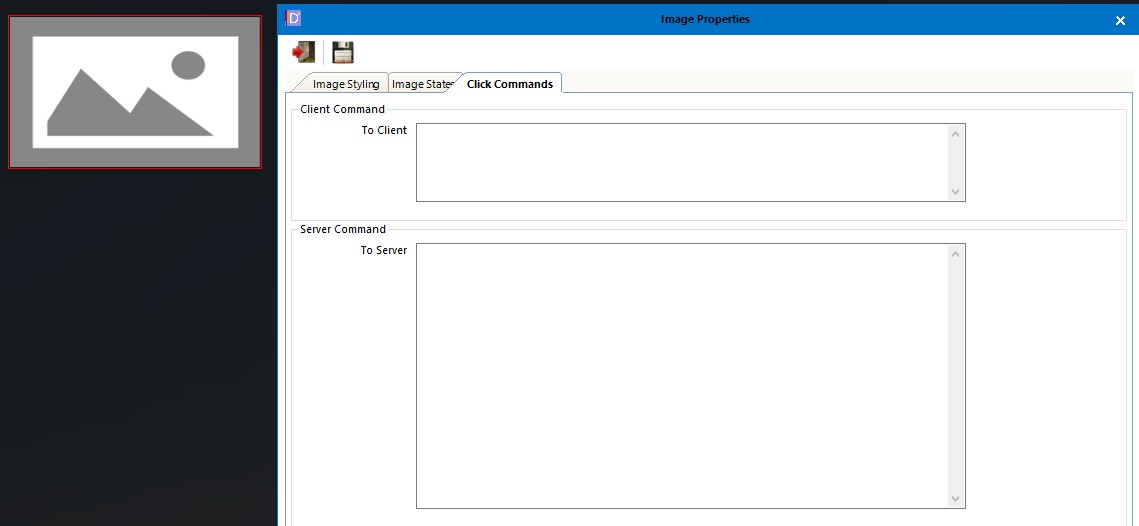
Older V5 myDesigner example:

The Button Object
The Button will be the object you use the most. You have complete control over styling and label formatting. Additionally you can specify the local or myServer command to be executed when the button is pressed. The Button object also supports an additional "State" variable that can be used to control the look of the button based on the value of the state variable.


Older V5 myDesigner example:

The Vertical Slider Object
Vertical Sliders are useful for controlling volume and dimming lights. The can be used anywhere incremental control of a device is required. Full control over styling is provided. You only need to specify the name of the server variable that tracks the range (0..100) and the myServer command to be executed when the volume slider is released.
Older V5 myDesigner example:

The Progress Bar Object
Progress bars track progress or simply can be used to track the level of a light. You make the choice. Style the bar to your liking.
Older V5 myDesigner example:

The Toggle Switch Object
Toggle buttons make great switches for turning lights off and on. You get to specify the label text and the server commands to be executed in the off and on state.
Older V5 myDesigner example:

The Gauge Object
The Gauge offers a different way to track and display the value of a server variable. Create you own gauge dials and needles or use the ones provided. Style the labels and the set the server variable to track. Setting Auto Range will allow the Gauge to automatically adjust the min and max values should the value exceed the defines min and max.
Older V5 myDesigner example:

Overlays
Aa scene is the storyboard or stage. it is the most background component on the page. Overlay's live on scenes. They cannot live by themselves. You cannot load a scene on a scene because at that point you are putting a background on top of a background. the last background loaded is the one that gets displayed. A scene is also a complete html page. while an overlay is only an html fragment.
Add an overlay by clicking on the New Overlay button at the top of myDesigner. Name the overlay in the popup that appears. You can add objects to the Overlay and control their loading in the Scenes Properties with regards to whether an Overlay is visible or invisible when the Scene is loaded.
The order Overlays are loaded dictate their Z order layer, from bottom to top.
Designer update for 2/9/2025
1) provides an option to turn off the "Your Offline..." popup when the webclient is not connected to myServer. Look in the properties of the project and you'll see the checkbox option to disable it.
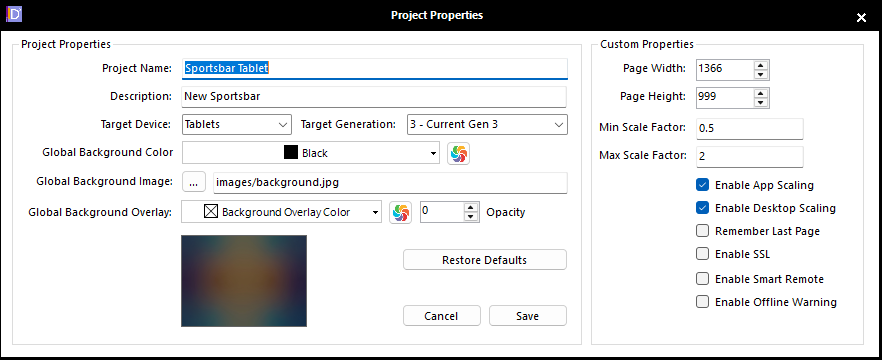
2) Adds the ability to play local sound on any client (like a SmartRemote). The syntax is
Local Client command: PlaySound|<<sound file>>~<<optional volume>>
myServer command: ClientCmd|PlaySound|<<sound file>>~<<optional volume>>
where:
Sound File is the path to a local or remote music file. Remote files must be a valid http url. Local files can be relative to the current project.
Optional volume is a number between 0 and 100;
example:
PlaySound|images/beep.mp3~50
PlaySound|http://someplace.com/somesong.mp3~33
As with any Javascript update, ensure you clear cache on the client for the new Javascript to be updated on that client.
Guidelines
1) Never look or be concerned with what lives in the \SampleProject folder that gets installed with the myDesigner software. That's for the myDesigner to use and nothing (no one) else.
2) All active projects MUST live in the myServer\HTML folder. No exceptions.
3) To make HTML happy project folder names will have all spaces removed from them when the project is created.
4) Same goes for scene files.
5) To get started on a new project install the appropriate sample project from the available sample apps via myInstaller. Currently they will create \HTML\myUI.Phones.samples and myUI.Tablets.samples folders.
6) Once you have installed the base project immediately copy the entire folder to a new folder (like HTML\Samples). In the HTML directory, rename the sample to be HTML\myUI.Phones and myUI.Tablets. This will. This will become to primary working project folder. If you download Allonis's updates, they will install next to your working folder so your customizations won't be lost.
7) You should next verify that you can access http://<your myServer ip address>/<your new project folder>/index.html from all the devices that you will be using.
8) If the Index.html page does not load or does not refresh then stop right there because there is something wrong that needs to be fixed. Most likely cause is that the myServer setting for DNS name has not been set to the IP address of the PC.
9) If you've got this far then it is time to look at the scenes in myDesigner. Make sure myDesigner sees your new project and the sample project in the project tree on the left side of the window.
10) Try editing the index.html file. (Note: that there is a 2 second delay when opening a scene and being able to edit the scene. This is done to allow the page to get fully loaded in the embedded browser. If you click too soon the page will still be "live" and it will execute the command associated with the button you pressed)
11) At this point in time you should be good to go with doing your own designs.
>>> how do you lock down a scene once complete to prevent accidental editing?
The only place a scene can be edited is inside the myDesigner itself. Opening the scene in any browser outside of the myDesigner will never allow editing. If you ever see this happen I really need to know about it.
>>> I am as well confused on your directory structure and the updated samples.
Every project will create the following folder structure CODE: SELECT ALL --\MyProjectName-.
|--\CSS <<<< Folder for css styles (Styles.css is the important file here)
|--\Images <<<< Folder for all the images used in the project
|--\JavaScript <<<< Folder for the JavaScript support files (Scripts.js is the important file here)
|--Index.html <<<< Home starting page. Every project starts here on this page.
'--ml.project <<<< This file is used by the myDesigner to know about the target device
>>>> After an update, do you then need to copy the sample back into a project? Yes and No. When a new release of the sample projects are released they will contain 1) bug fixes or enhancements to the existing scenes and 2) new scenes supporting additional modules. You should install the updated sample and open it in a browser (Get used to using Google Chrome as your default browser. Internet Explorer does not work and we will never add support for it.) and review the update. If there is something new in the sample project that you can use then you should copy the HTML files from the sample into your working project. Knowing what files to copy is easy as all the files will all start with the name of the module. So copy Movies*.html, Music*.html, SatRadio*.html, etc. from the sample folders into the new. Then to be safe copy the CSS, Images and Javascript folders from the sample into your project. Overwriting the existing files.
You will also find a button on the myDesigner main menu bar labeled "Refresh Support Files". Pressing this button will copy the latest versions of the styles and scripts into your projects CSS, Images and JavaScript folder. So it accomplishes the same feat it just doesn't touch any of the html files.
Advanced:
How to make an Overlay appear
First make sure the overlays that are in play are getting loaded when the scene loads. Look at the overlays tab in the scene properties. Then you can use the local client commands Show|overlayname, Hide|overlayname and Toggle|overlayname. Where overlay name is the CaSe Sensitive name of the overlay minus the .html bits.
If you need to manipulate the overlays from a server command then the commands look like
WebCmd|{{clientname}}~Show|overlayname
WebCmd|{{clientname}}~Hide|overlayname
WebCmd|{{clientname}}~Toggle|overlayname
Back Button:
WebCmd|{{clientname}}~BackScene
Launching Chrome full screen and with size parameters:
"C:\Program Files (x86)\Google\Chrome\
You can also use: --window-position=x,y
Determine your devices actual resolution:
The app will try to make everything fit given the defined target aspect ratio. Check the TARGET_WIDTH and TARGET_HEIGHT values that have been defined for the app in the Custom.js file. Then should match the actual pixels available on the device.
To find out the real number of pixels available on the device use the client command
WebCmd|{{clientname}}~ShowDimensions
Where {{clientname}} is the client name of the Kindle being tested. You'll see an Alert box pop up on the device showing the active width and height dimensions in pixels. Are they really 1280x800 and 1024x600?
Once you know the real numbers then you can tackle the aspect ratio issue. For example, the smaller Kindle has an aspect ratio of 1.7 while the larger one has an aspect ratio of 1.6. App scaling will only work well when all devices share the same aspect ratio. To get the app to scale correctly on both devices you would have to design the app on the smaller Kindle using either 1024x640 or 960x600 as the Target Width and Target Height.
Dynamically updating images
To update images by specifying the file names by having a myServer variable called {{myimage}} with a value of someimage.png. For the image object, If you specifiy the filename as images/{{myimage}}, this will not refresh the screen if {{myimage}} changed value.
However, if you have {{myimage}} have a value of images/someimage.png, and for the image object you specify the filename as {{myimage}}, then a screen refresh will occur when {{myimage}} changes.
(thanx Roman for providing this tip on the forum)
Clientname Addressing
The client device names do default to the devices IP address prefixed with a w. like w1921681145. You can define custom client names as well (recommended). You can find example code on the "About page" in the sample HTML UIs provided. Clientnames must be unique, and start with a letter. The name must be lowercase and not contain any punctuation or spaces.
Editing floorplans
When editing a floorplan, sometimes it's not easy to modify objects at the bottom of the page. To make this easier, doa Select All and move all objects up using Shift-Up which moves all up 10px at a time. Keep track of how many times you move the group. Once your editing is complete, Select All and Shift-Down the same number of times and save.
Special Fonts
The myDesigner includes several special web fonts that are useful for control icons and other special characters.
If you want to inject an icon into a label you can insert code that looks like
Code: Select all
<i class='fa icon-material-touch-app'></i>substituting icon-material-touch-app with the name of the icon you want to inject. For button objects just pick the icon from the dropdown.
You can install the latest Material fonts into the project\css\fonts folder. Then you'll have to edit the font-icons.css file adding in the new icons that are missing.
The following images depict the keyboard mappings for the fonts.
Pictos Font

Transports Font
Font Awesome


Adding Fonts (Advanced)
Make sure you download the appropriate web font files and put them in the smartremote/css/fonts folder.
Then you have to edit the font-icons.css and add the appropriate font-face entries for each of the Helvetica font weights you want to use. You'll see entries like
/* designer-font:Roboto */
@font-face {
font-family:'Roboto';
font-style:normal;
font-weight:100;
src:url('fonts/roboto-v19-latin-100.eot');
src:local('Roboto Thin'), local('Roboto-Thin'),
url('fonts/roboto-v19-latin-100.eot?#iefix') format('embedded-opentype'),
url('fonts/roboto-v19-latin-100.woff2') format('woff2'),
url('fonts/roboto-v19-latin-100.woff') format('woff'),
url('fonts/roboto-v19-latin-100.ttf') format('truetype'),
url('fonts/roboto-v19-latin-100.svg#Roboto') format('svg');
}
You will need to add similar css entries for the Helvetica files.
The line that reads /* designer-font:Roboto */ is what informs the myDesigner that the font is available to use in the project. You would add a similar /* designer-font:Helvetica */ line at the top of your Helvetica font css font-face list.