



Allonis Master Image for TVBox
The myServer 6 Master Image for TVBox includes:
- myServer 6
- TeamViewer for remote management of the server
- Installation utilities for headless installation like WiFi Access Point mode
- LinuxOS w/Desktop pre-configured for use as an automation server
- Docker software to install optional packages
- Firmware update files to boot from USB or NVME M.2 drive
Notes:
- Due to support issues, Allonis does not support installing myServer 6 to a non Allonis Master Build. Sure it's possible, but there are a lot of steps...Allonis can be contracted to assist if this is really needed.
- It is highly recommended to purchase myServer 6 controllers direct from Allonis. A pre loaded USB stick is also available (must have Pi4 4/8gig on latest firmware set to boot from USB).
- One of the possible reasons to install a Master Image on a new USB drive (recommended is 400mhz 128 gig) is that the boot sector of the USB has been corrupted due to power cycling. Power cycling is NOT recommended as it is very possible that that will damage the USB drive, which prevents system boot. See notes at the bottom of this article for specific corruption assistance after the Master Image has been created. Power cycle related failures are not covered under Warranty. It is highly recommended to have myServer controllers connected to a UPS and monitored by myServer (see Allonis for details).
Required:
- Windows PC connected to the Internet. MacOS can be used to burn the image (using Etcher) as well.
- USB 3.0 flash drive (ideally 400mhz) 16gb or larger (Samsung 128gb 400mhz is recommended) or SDMicro read / write hardware (or an SD reader and use the SDMicro adapter that a lot of SDMicro sticks come with)
- If SDMicro as a boot drive (USB 3.0 recommended): SDMicro 8gig / Class 10 memory stick
- Best is NVME M.2 drive as it is fastest read / write and can be signficant capacity
- M.2 to USB drive adapter (if you are using the M.2)

- "Etcher" software to burn the Master Image to the SDMicro / USB / NVME stick (NVME requires usb adapter)
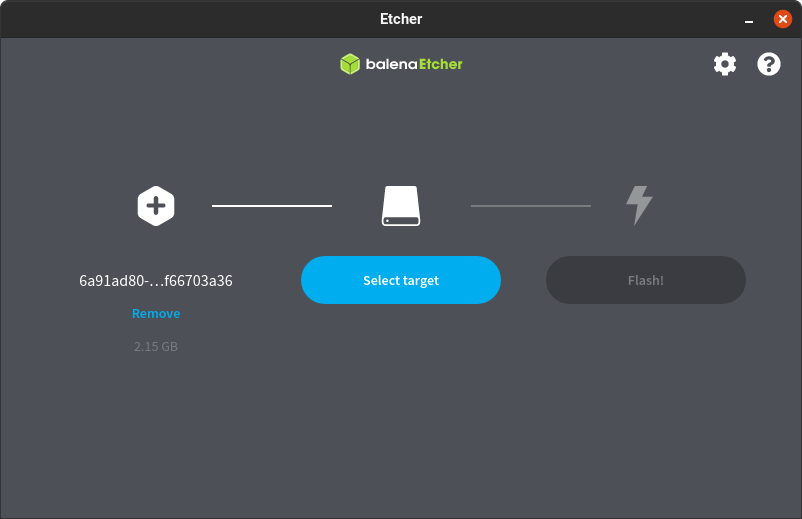
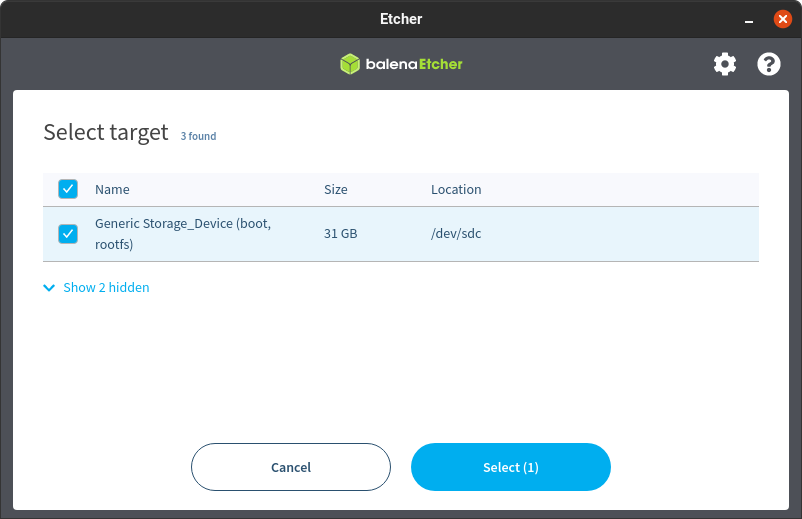
Select the USB Flash drive you want to use for your Raspberry Pi (NOT the Boot Drive! - which is typically hidden from view)
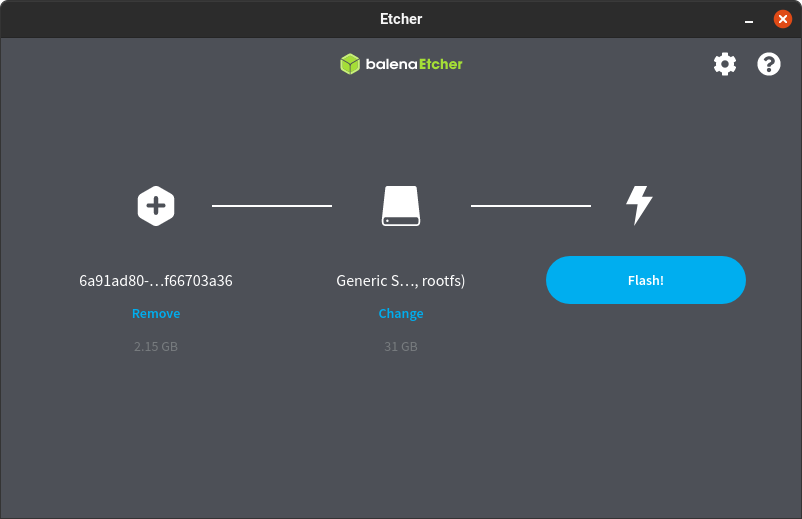
Click on “Flash!” to start writing the image:
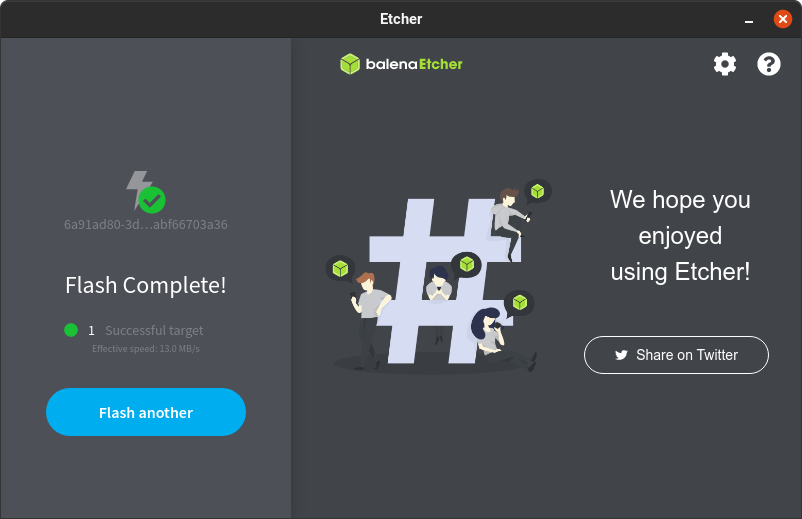
When Balena Etcher is finished writing the image you will get this confirmation:
- TVBox controller from Allonis.
- 1080 Emulator HDMI adapter for headless operation.
- Optional: "Putty" for Mac or "Putty" for Windows software to remotely connect to the Pi
- HDMI video adapter cable connected to an HDMI monitor (for installation)
- Wireless keyboard / mouse (for installation
Instructions:
Download myServer 6 (Raspberry Pi OS w/ Desktop) Master Image HERE
X96PlusUltra-TVBox-Master-2025-07-07.zip arm64 for either a Pi4 or Pi5 (4 or 8 gig).
Once download has finished, you’ll have a zip file. Unzip it.
Click HERE to learn how to create a bootable image device.
Once you have the boot image to a USB 3.0 drive. Highly recommended for speed and reliability.
Insert a tooth pick into the Audio jack. Be careful and feel for the switch to detent slightly. Once clicked, insert the Power connector. This will then boot from the USB drive and not the internal EMMC memory (which is a TVBox application by default).
The system will reboot several times (you will see the "Allonis" logo three times) as it reconfigures its settings for your network. Be patient until it finally reboots and stays running. This will take about 10 minutes total.
All Allonis software resides in the /home/allonis/applications folders
Debian OS Username / password is allonis / allonis
To change the system boot order (so you don't need to use the toothpick to select USB boot:
- open a terminal window
- type su and then enter the password tvbox
- cd /root
- ./aml-multiboot-setup.sh
That will change the boot order to sd card / usb stick / emmc
Open browser to myServer's dashboard (http://127.0.0.1/dashboard). You may have to click "Unlock Profile and Relaunch" (one time). Enter command for SetHostName|<<name of computer>> Or click on the computer name on Dashboard home name. System will restart and the computer name on the network will be what you set. This also shares folders on your network to make it easier to do server file maintenance.
Once system reboots, connect again and add all project relevant software using the Software Updater in Dashboard. System will reboot after it downloads all files.
Update the OS image by ensuring the Pi is on the Internet and then clicking on the desktop's menu / Accessories / Get Updates. A command window will open and a list of new files will be generated. The window will then close. Next, perform a Get Upgrades. This will have prompts that need to be read and selected. When the upgrade is complete, reboot Pi. The upgrade will take several minutes depending on your network speed. HAVE Patience!!!
How to determine myServer's IP address: If you have a monitor / keyboard mouse connected, click on the network icon on the OS desktop and you should see the network IP address (you can also static address the controller there too). If you don't have a monitor, then look at your Router to see what address has been assigned to the device that has "myServer-some random number" as a computer name. If the controller has been renamed (like to the bar's name), then look for a device with that name. You can also go to http://barname/dashboard if it has already been renamed. You can also install network "ping" tool like "Advanced IP Sniffer" on a Windows PC on the network.
Once booted, if you are using a monitor and keyboard / mouse, you can change the computer name in the myServer Desktop. Click on the current hostname form Dashboard / change the Hostname in the command line (replace "myServer" with your new name) and Run the command. System will reboot a few times.
Once the TVBox reboots, myServer 6 should be running as a service. You can then configure the system for your facility HERE.
Go to myServer's webpage: http://myServerIPAddress/dashboard first thing is update myServer from Utilities / Software updater. You can also use http://computername/dashboard.
Once you are satisfied that the system is operating fine, you can choose to burn the USB image to the TVBox internal EMMC memory:
When you are happy with how it work write it to emmc using:
./aml-install-to-emmc.sh in the same folder
Advanced:
myServer 6 installs to: /home/allonis/applications/Allonis/myServer
Notes:
If the "activate.video" macro has server variables using {{vout*} then it is old and cannot be updated to a later version of myServer 6 software suite (all macros must be updated to latest syntax first).
OS installs with root/tvbox for permissions
On some myServer 6 devices, you may run into an issue where the myServer Event Viewer (launched from Raspberry PI Desktop menu) won't load. This can be due to Chrome permissions need to be reset:
sudo rm -rf ~/.config/chromium/Singleton*
sudo rm -rf ~/Documents/Singleton*
Later versions of myServer automatically run these commands when the computer name is changed using SetHostName command in myServer command builder.