


• Try Us Out - See our Demo Tabs Above

    Sports Bars

    Experience our Sports Bar TV, Audio and Lighting Control System with our awesome demo! We provide multiple TV control systems that will easily integrate your Audio/Video and environmental components into one easy to use package. Let multiple hand-held remotes be a thing of the past and experience hassle free one-touch control. With the versatility of myServer 6, you may be able to retrofit existing equipment into the control system which makes it economical to get the most value out of your technology investment.

    Residential

    With a whole new exciting look and feel our transparent "Moonlight" user interface allows clarity and ease in maneuvering your lighting floor plan, climate control, security cameras, and security keypad as well as entertainment options. Control all aspects of your home with simplicity and confidence.

    Digital Signage

    Allonis makes it easy to control and launch your media content. We have created software that ties in seamlessly to your bar or restaurant control system. Upload new images and videos, discard old ones, decide what to play or post and where with just a few selections.

  • Sports Bar & Restaurant Demo

    Select a source on the left and then select the TVs you would like to change on the right.

    Along the bottom are options for a DirecTV remote, TV Guide, Audio, Favorites & AppleTV. In addition you can touch the video camera on the left hand source options to get a live preview of what's playing on that source. Be sure to click around and try everything.

    Read More


    Customer Listening Experience

    Pan from left to right and up and down to see all the TVs.

    Customers can select the TV closest to them to tune in to the audio.

    Read More


    No Floorplan Option.

    If you are not interested in a navigable floor plan we can provide a generic interface instead.

    The same features are supported.

    Read More
  • Residential Demo

    Below is our residential simulation.

    Be sure to click around and try everything. Read more about the UI below.

    Read More
  • Digital Signage

    In the large window select a player on the left. Then select an option layout on the right. Select available assets from the list provided. You can add a ticker of either a message or weather by checking the boxes. When you are finished making selections click “send to player”. Your choice will appear on the corresponding player above. To pause a video click the player once.

    Read More
  • SmartRemote Demo

    Below is our SmartRemote simulation.

    Be sure to click around and try everything. Read more about the UI below.

    Read More

Our Products

See the latest myServer 6 products, available for individual purchase or part of a custom Allonis system built especially for your project.
Software
Hardware
Sports Bars
Services

The Denon driver supports all of Denon's IP Audio Video Receivers.


Installation

Example of configuring the Denon as a DLNA player with TuneIn streaming application.  Usable with all Denon receivers that support DLNA (like those with HEOS).

Download and install the Denon Driver and TuneIn App from Software Updater on the primary myServer 6 Controller. You should also download the sample HTML5 Modern Tablets and Phones UI or SmartRemote templates and install on your myServer 6 Controller.

Restart myServer 6.

  1. Within the Denon Driver, click configuration and choose Add Receiver from the command list.
  2. Edit the command for the Denon friendly name ("GreatRoomDenon"), it's IP address and the room name it will be supporting.  Repeat the edit process for any additional zones that the AV receiver will be supporting.  Delete any Denon devices that aren't available (like Zone 3).
  3. Note the device ID for Denon Master Zone you want to use for TuneIn in your selected room.
  4. Click on myServer Applets.  Select to Configure TuneIn.
  5.  Edit the activate-source.tunenin macro for the specifics of your installation.  Follow the comments in the macro to edit the appropriate lines.
  6. Edit the active.roomname macro for the room you will be listening to TuneIn.  Here you will put the power on command to power the Denon: "AV|26~Power~On".  Associate the TuneIn device ID of the Denon DLNA player
  7. "// The radio streamer! 

    SetVariable|{{activeroom{{clientname}}}}avstreamer_id~29!".

  8. re-Start myServer.
  9. Open browser and open your systems "iPad" user interface and activate a User (that you configured with TuneIn service), activate the room (that you inititialized with TuneIn.  Select at the bottom left the media sources. Select TuneIn Radio icon.
  10. The TuneIn user interface should open. Select top right on Browse and choose a TuneIn Station that should be populated with your TuneIn account channels.
  11. Shortly, the audio stream should connect and you should be listening to that station through the Denon speakers.  You can control the volume as well.
  12. The supported commands for the Denon driver are listed in the Command builder within the Denon Driver Configuration.
  13. If the Denon receiver supports HEOS, click HERE on how to setup the HEOS services.

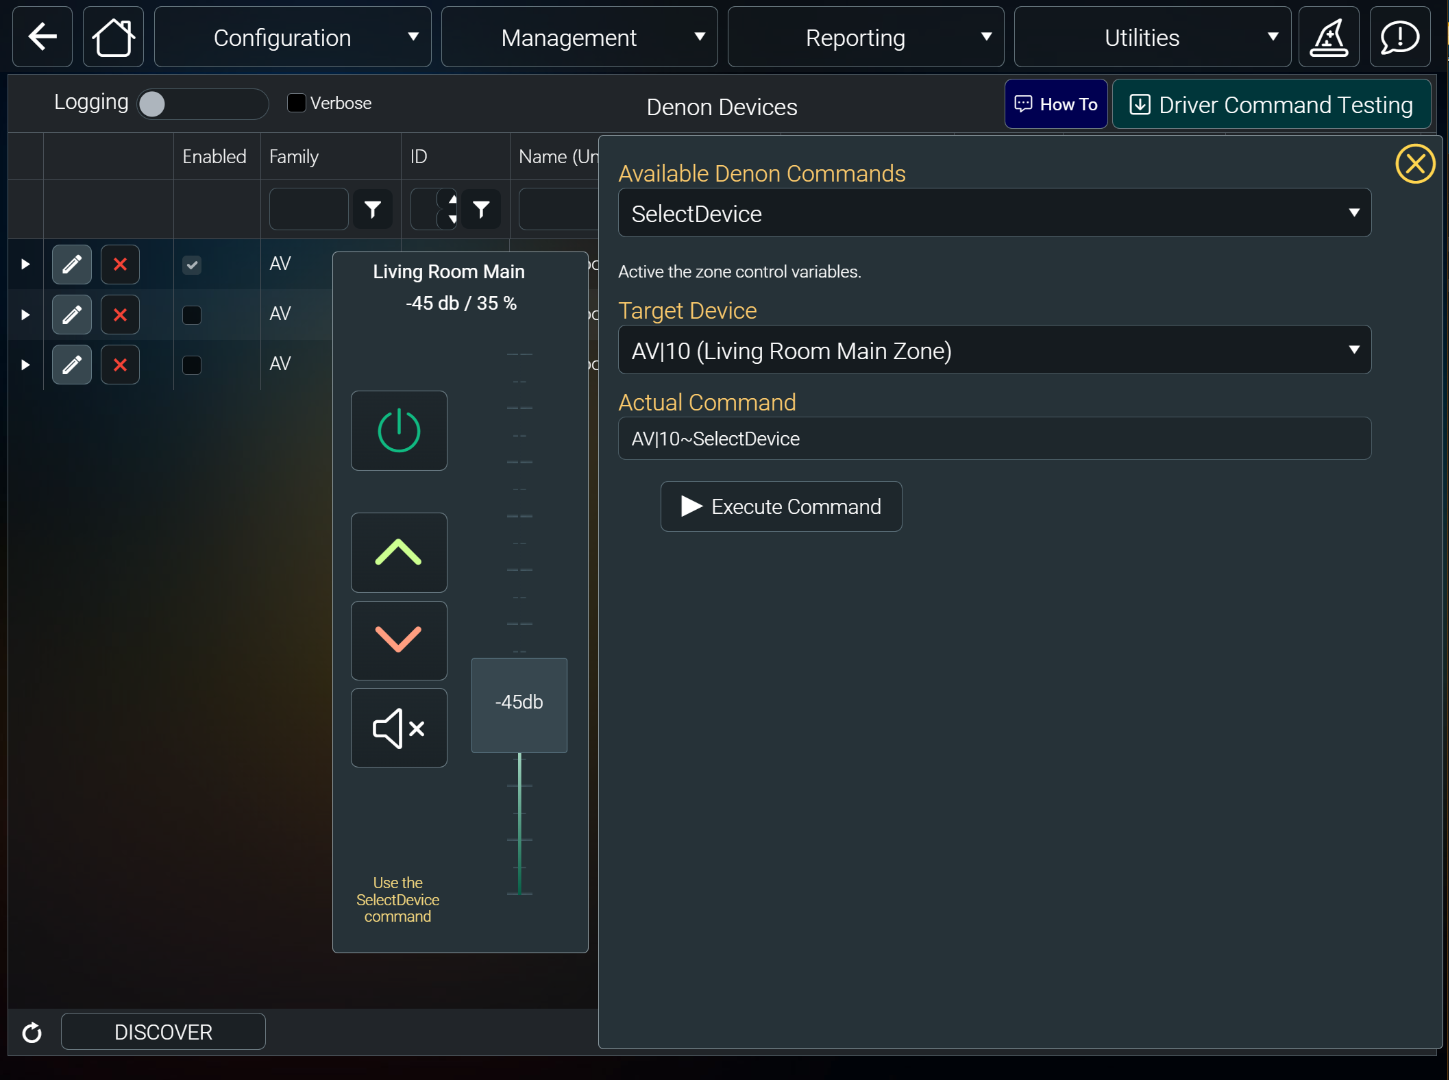
Here is the Denon driver showing the db variable being used.
 

Denon1.png


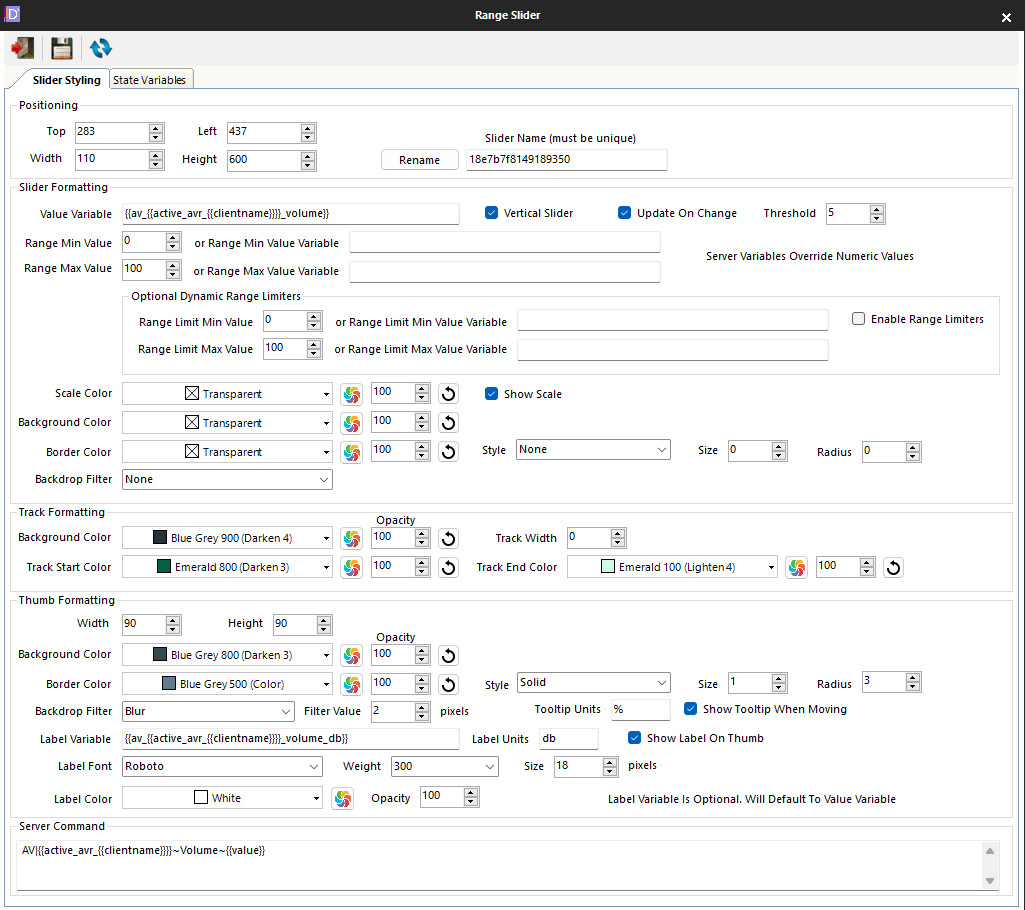
Here is the web object being edited in the Designer showing the new Thumb label variable.
 

Denon2.png